Scrivener Project Statistics
Reach Project Statistics/the Statistics Panel by:
1. Using the Menu command Project > Statistics
2. Clicking the Project Icon in the main toolbar (if added)

3. Hovering over the Quick Search Bar in your main toolbar, which can show both your Project and Session Targets
4. Using the Keyboard shortcut Windows Key + Ctrl + Shift + S
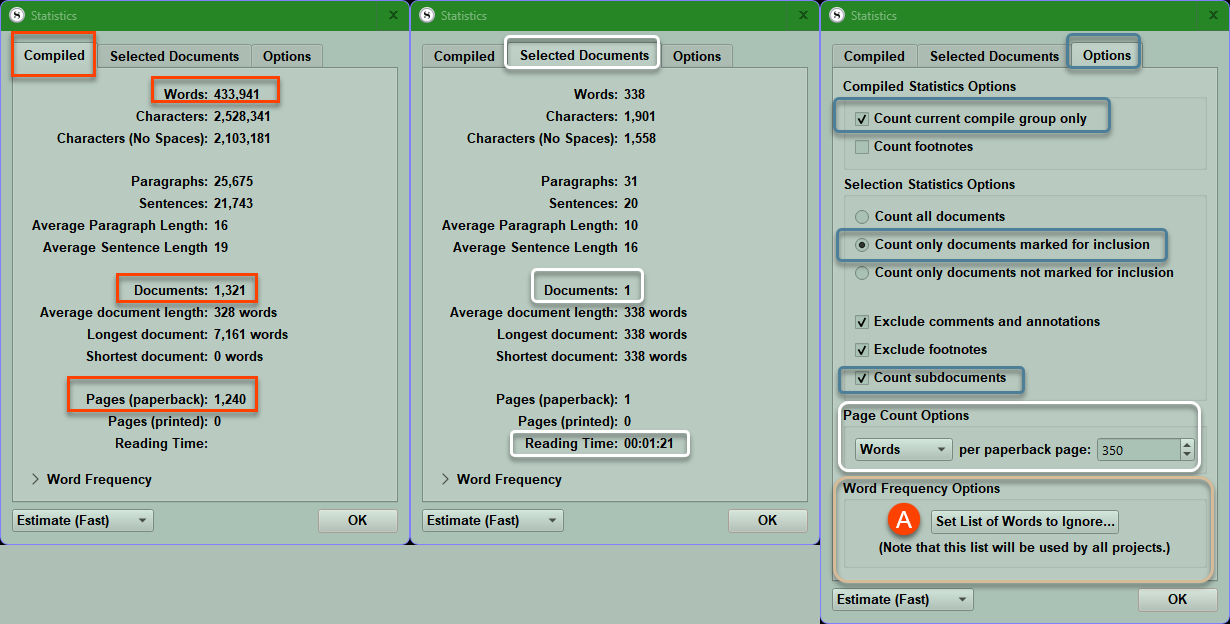
The three Tabs of the Statistic Panel
For large projects, this may take a minute or two for Scrivener to calculate these numbers.
Note: Word Frequency has a drop down to show overused words, and this panel can be expanded by using your mouse to drag the sides of the window. (Under the Options tab, you can add or subtract words to ignore when viewing this information under the Set List of Words to Ignore tab) [see A above.]
The Compiled Tab
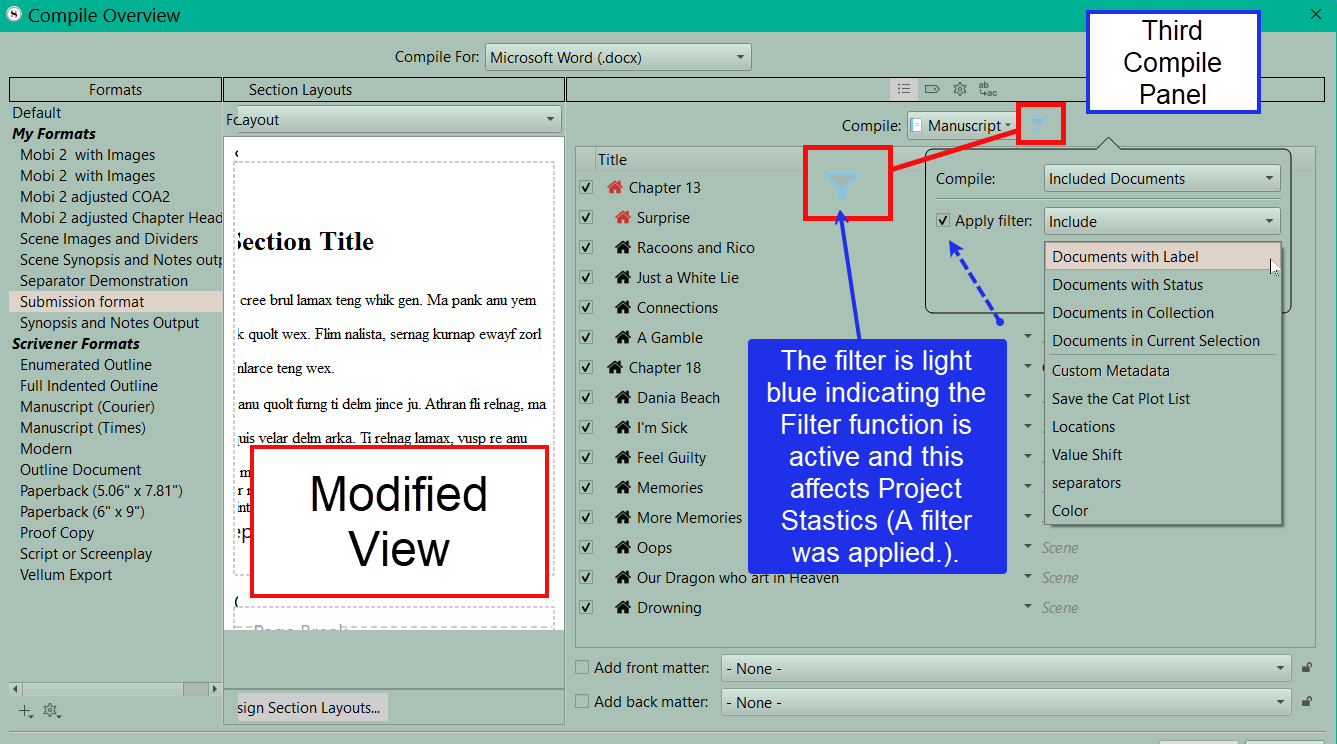
Your results here will be affected by choices made in the third Options panel above AND any filter settings applied in the third panel when you open the Compile function. If the filter is active the filter funnel with be a light blue.
Do you count all documents or only ones you intend to compile (Include) and do you count subdocuments? Your default choice should be to count subdocuments.
Here you will see the number of documents included with the word count and the number of pages this would represent. Note, how many words each page should hold can be changed by you under the Options tab. (The default number used is considered to be the industry standard.)
The Selected Documents Tab (see above)
Selected Documents applies to all currently highlighted/selected folders and files. All included subdocuments are used to generate the numbers seen when using this selection.
You could open a Collection and use Ctrl + A to select all files inside it and using the Statistics Panel would give a word count for the collection under this tab.
Stats AND Word Frequency numbers you see in this pane of the Statistics Panel ONLY apply to the selected document(s). If you only choose a single file, then the stats are only for the single file. If your chosen document is a folder, or a file with subdocuments AND YOU CHOOSE the SCRIVENINGS VIEW then the Selected documents numbers and word frequency info will apply to multiple files.
The Options Tab
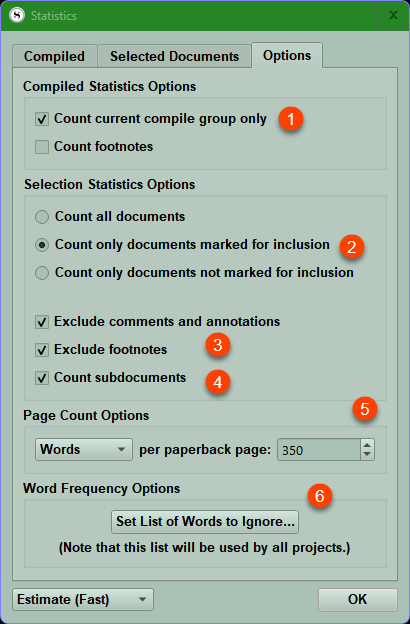
There are many options here, and we will discuss a few.
1. Counting the current Compile Group only will count the highlighted binder files for statistics BUT NO SUBDOCUMENTS (unless you check box #4). This also reflects any choices made with the Filter option in the Compile Panel. (If the filter is active, then the funnel is usually a light blue.) (This can be affected by your theme choice.)
2. This middle option is the most logical default choice and will only count documents marked for inclusion (ie to Compile). If you chose the option to count all documents, then you ignore a subdocument’s Compile Status.
3. Allows you to choose to exclude footnotes, comments, and annotations.
4. You almost always want this checked to count subdocuments whether in a folder (like a Chapter with Scenes) or a file with subdocuments.
5. Here you designate the words per page in the standard paperback. In the US, this is classically 350 words per page.
6. This will display word frequency, but you can manually add to the list of ignored words. For example, you may not want to count common words like the, he, she, a, an, etc. This list is a global option for all projects. You can add to or subtract from this list at any time.
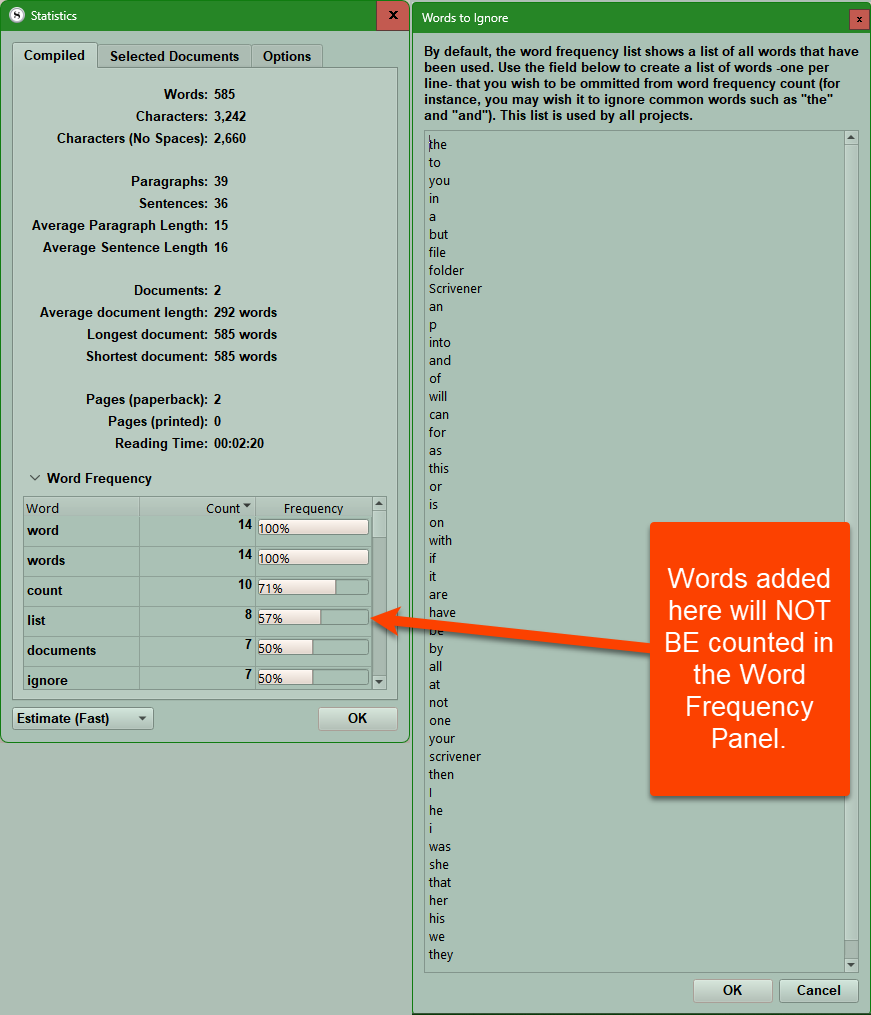
Word Frequency
Click the > caret left of Word Frequency to see a listing of frequently used words. The word used most often in the Project is given a frequency of 100% and all other words have their frequency percentage based on how many times they appear in comparison to the word used most often.
The table and word frequency window can be expanded by dragging the panel’s edges with the mouse.
If you click the options tab, then you will see a tab. This sets the list of words to ignore when creating the word frequency window. You can add to this list by typing in one word per line.
This list of words to ignore is ACROSS ALL Projects.
In any case, consider adding the names of novel characters or locations here, because you don't want them to count as overused words.
If you accidentally add a word, this can always be removed later by highlighting the word and hitting the delete key.
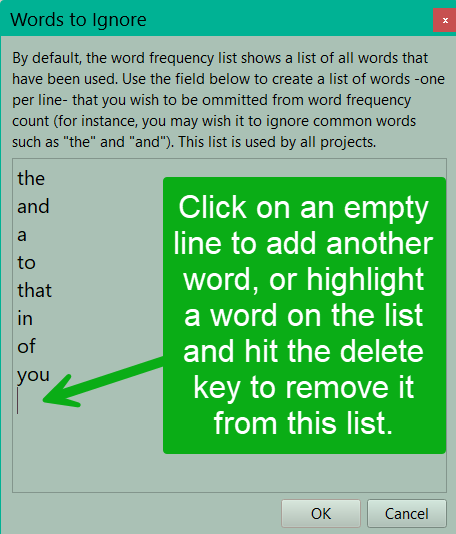
You can only add one word at a time to the ignore list and only one word per line.
Glancing at the Word Frequency List will show lots of small words like the, in, and, etc. Which you may want to remove from the Word Frequency List, but there is a trick to adding words to ignore quickly.
Consider using the built in Windows Snip or a similar screen capture software to capture an image of your overused word list. From this image, it is easy to add multiple words to your ignore list (one per line) which allows the word frequency to highlight the overuse of particular words in your project. This prevents adding one word and then going back to the Word Frequency list to see what other words you want to add.
Quick Search Bar and Project and Document Statistics/Targets.
Hovering the mouse over the quick search bar reveals the current day’s word count and your target for the project, followed by the number of words written towards this novel target today and your daily session target to be finished by your Target date. This method allows you a quick assessment of your current progress toward your goal. Remember, in order to have a daily session number, you must set a target completion date (Deadline) sometime in the future. The below image illustrates how the Quick Search Bar numbers mimic the information in the Project Target panel. The image below displays both the Quick Search Bar and the Target Panel below it. You can see how the red and white boxed information is identical in both areas.
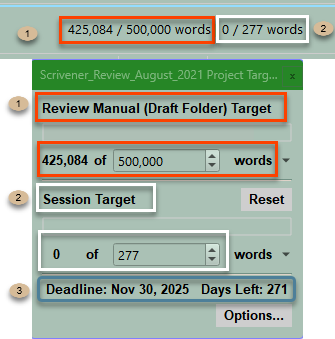
#1. This reflects the Project/Draft folder target.
#2. This reflects the Session Target to finish your Draft on Schedule with the first number being the number of words written in this Session.
#3. This is your deadline to finish your project and the number of remaining days left to the deadline. (This date is ONLY displayed in the Project Target Panel.)
If there is no date for finishing your project, then you still see the number of words in the Project and your overall goal (#1), but the Session Target changes and only displays the number of words added today and the total remaining to reach the word goal for the project (#2). The Quick Search Bar will display the number of words produced today (#2), but only the progress bar towards the Project’s total word goal will be displayed on the top of the Quick Search bar. The progress bar will now only be on top (#4) and display your progress toward the Project’s word target.
The deadline previously seen above is missing if no target date was ever set for the Project. (#3)

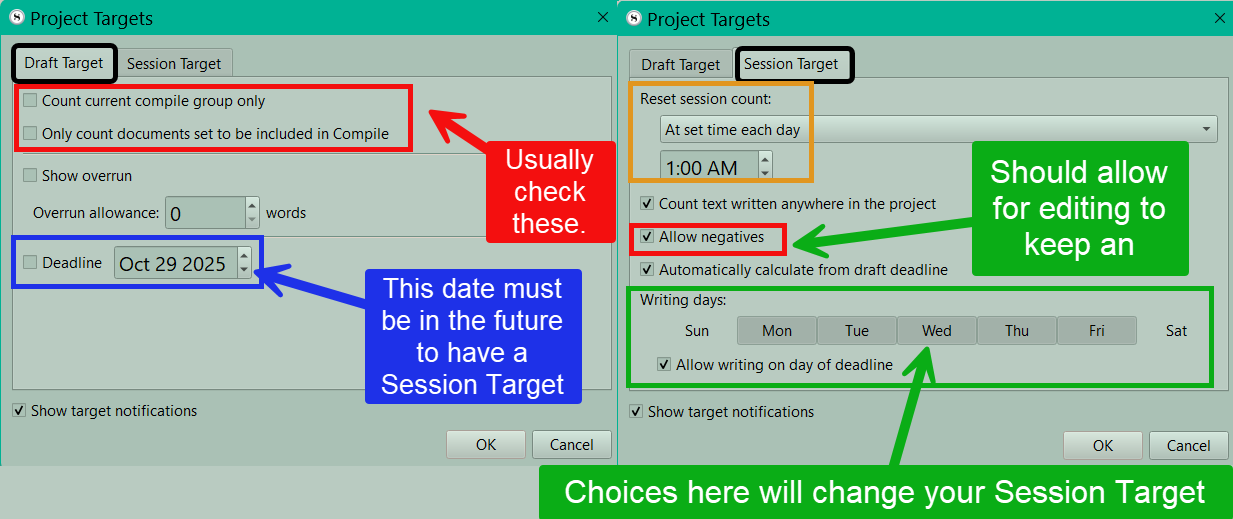
The options you choose for your Project Targets will affect the Statistics you generate. Generally you will only count documents to be included for Compiling in your Project targets. As stated above, the deadline for your project should be in the future to generate Session Targets. Which days you write on in every week will affect your Session Targets. Ideally, you allow negatives to get a more accurate Project word count. Below is an image of the Project Target options.
You can set the color of the Progress bars for Session and Draft targets in the Quick Search Bar in the Options Panel using the Menu command File > Options > Appearances > Target Progress Bars > Colors.