Separators and Compiling
Separator Facts:
The Separator’s tab in the Compile Format Designer is just below the Section Layout tab.
Separators determine the spacing between different Section Types (Acts/Parts, Chapters, and Scenes) as they are assembled into a single Compile Output.
Separators can be defined either as broad defaults applied to every Folder or document, OR as a unique group of settings for ONE or multiple specific Section Layouts. (see below)
The Separator pane is not available in FCF and FDX (Final Draft) formats.
In the Separator Pane, you can change the arrangement order of your Section Layouts. I like to arrange them in the order they will be used in the Compile Format. For me that is Act, Chapter, and Scene Section Layouts. Doing this will be reflected in the Second preview pane of the Compile Panel after Section Layouts have been assigned.
***Note: Any Separators or placeholders for separators will NOT appear in the Section Layout preview pane in the Compile Panel. These occur BETWEEN Section Layouts and are not seen here. You will have to Compile to assess their effect on the final product’s appearance.
Separators are not available for the As-Is Section Layout. If this is assigned to your Front and Back Matter folders, you cannot change the page break separator options for these sections.
The Blank line separator option is only available to Section Layout Types, and NOT to the default Folders and Text files.
Your First decision is:
Whether you will use default separators for folders (classically Acts/Parts and Chapters) and Text Files (classically Scenes). [see #1 below]
Your choices with these separators are Where and What (you use):
The Where options where separators can be applied are:
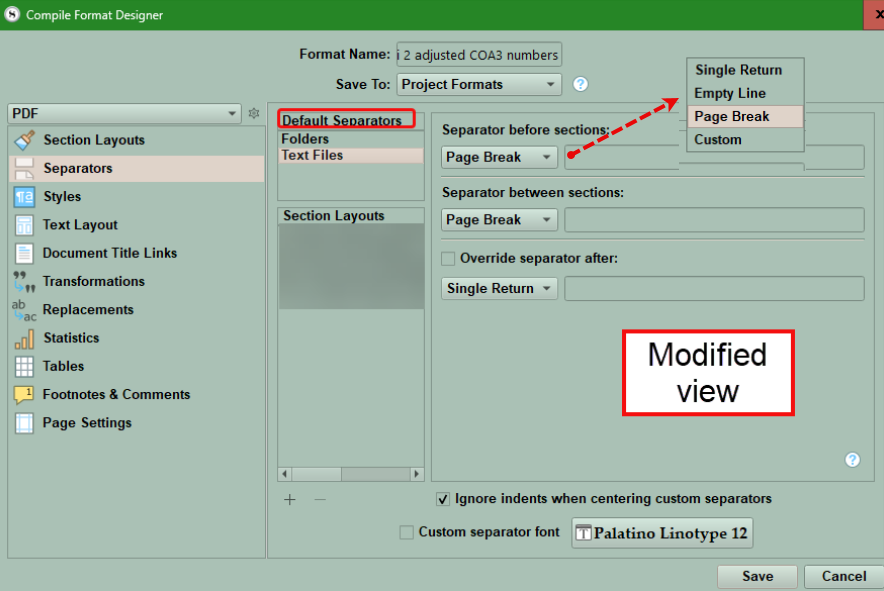
1. Separator before (the) sections (Layouts)[A]:
2. Separators between (individual) sections (Layouts)[B]:
3. (Here you can) Override (the normally expected) separator after (this Section Layout)[C]:
The What options which can be applied are (#3 below):
Single Return
Empty Line
Page Break
Custom (here you can use symbols or placeholders)

Where:
What do these Choices of where to apply the Separators mean?
1. Separator before sections [A above]:
This separator is applied before a Section Layout of a different type.
(If this is the first item to be compiled, then by definition there is nothing to be separated from and this setting is not applied.)
When you have multiple Section Layouts/default file types of the same kind in a row [For example, multiple Scenes in a Chapter], ONLY the first in the series will use the Separator before Section option you have assigned to this type of Folder or Text file. The following scenes will use the separator you have chosen to use between Section Layouts of the same type.
This is the simplest form of separation to work with. For example, if you have Acts as a Folder in your novel, you may want a "Page break" as its separation type to clearly separate it from the end of the last Scene in the previous act.
This will usually apply to Chapters as well. You would often like to clearly separate it from the last scene of the previous Chapter by using a page break as well.
(Note: to see this, you must have some File or Folder before the "Act" to see this separation occur. [For the first Act, this could be your Front Matter.] If there is nothing before the "Act 1" in the Manuscript/Draft, then there will be no "Page break".)
This is an important exception to keep in mind for separators in general: they must be separating the item from something in order to insert a separator.
2. Separator between Sections (of the same type) [B above]:
This type of separator is applied between Section Layouts of the SAME type.
Classically this is used for Scenes.
When the Section Layout/Section Type of the item preceding the current document uses the same/identical type of Section Layout (ex. Scenes), then the separator between sections option [B] will be used. This scenario would most likely happen between a series of Scenes in a Chapter. This separator can be a Page Break, where the next Scene starts on fresh page, or a smaller separation such as a single return (one space), empty line (two spaces), or a custom separator which can be text symbols like ***, or ⁂ centered on an empty line. You can also use images to separate similar Section Types like Scenes by using image placeholders in the blank space to the right of the separator, but any section could use these. (A sample image separator is below. Note: Like for any image you use in Compiling you can add a width, height parameter, or ebook width size to change the size of the separator imaged when it is compiled.)

3. Override separator after [C above]:
This option not only inserts a separator after a specific Section Layout, it will do so in all cases. THIS OVERRIDES any of the Separator before options from other Section Layouts if necessary.
For example, below the highlighted Scene Section Layout "Text Section with Heading" [My name for a scene with a title included.] would ALWAYS have just a single return after each "Scene" no matter what followed which would OVERRIDE the rules for other Section Layouts like Chapter Number (Chapter Section Layout). The rule for Chapters in this scenario was set to be a Page Break before the Chapter and its number appear, but this would be OVERRIDEN by the Scene Section Layout’s use of the Override separator, which has been set as a Single return. In this situation the end of the scene would only be separated from the next Chapter’s header by a Single Return, rather the default separator of a Page Break before the Chapter header, EVEN IF the Scene ended in the middle of the page.
Let’s See an example of this after compiling:

Note: In this case, the single return includes an image placeholder, which was added to the Section Layout for Scenes, so a visible separator appears when this is compiled.
4. Blank line separators (These are only available when applied to Section Layouts):
These will be discussed in detail later in this article.
Default Separators
Separators can be applied in a Default manner to all Folders/text files in your compile output in a uniform way. In a novel format, folders would be Acts/Parts and Chapters, and text files would be either Scenes or any front and back matter you add to the novel.
The settings below can be changed from the (Scrivener) defaults to any option you want. Once you make changes, remember to click save. These choices then will affect every folder and text file you compile.
Custom Separators:
You can assign unique separators options/choices to each specific Section Layout (Each one or only a few) which will override the default settings IF you uncheck the box to use default separators. [see below]
*This checkbox option ONLY appears when you chose a Section Layout.
*You can make a different choice for EACH Section Layout in your Project including choices for how the default separators will function.
*When choosing to apply separators by Section Layouts, additional options inside the Orange boxes become available. If you choose a custom separator, then you can apply the two settings in the white box to it. (see below)

What (The separators you can apply)
Scrivener gives you only four options for how to separate Section Layouts/ or Default file types:
1. Single Return:
With a Single Return a single paragraph break is inserted, which causes the final appearance to appear seamless. Text will flow without a visual divider. Essentially a "no separator" option. [Folders, documents, or Layout Sections will not appear to be separated.]
2. Empty Line:
This causes a double paragraph break to be inserted, which causes a visible space (a single blank line) between items. [Folders, documents, or Layout Sections will be separated a single additional line of white space.] This is the usual option used between scenes unless you insert a special character(s), or an image using placeholder tags.
3. Page Break (default starting point):
****For certain Compile output types, there will be different rules. (see below)
This causes the next item’s text to move to the next page. This is the usual separator option between Acts/Parts and Chapters.
For Plain-text (TXT) Compile outputs, a page break will insert sixteen empty lines since plain text formats cannot use page breaks.
For Ebook formats Compile outputs, a page break causes a new item to be added to the Table of Contents, and most readers will display some type of break in the presentation as well. Note: If a chapter’s subsections (ex. Scenes) have page breaks this will add an entry in the TOC and they will pick up the name of the folder (Chapter) they are in and could present as repeat entries.
4. Custom breaks (You can also set the font for separators at the bottom right of the Separator screen):
Anything entered here, be it symbols (***), special fonts, or image placeholder tags <$img> will appear between any items this separator is applied to on its own separate line.
NOTE: There is no preview of custom separator fonts or images in the Compile Format Designer’s second pane.
If you need to add an extra line of space for a Custom break, use the keyboard combination Shift + Enter keys to do this. You will see this symbol ⏎ to indicate an extra space has been added.

You have two additional options for Custom separators. (see below in white box)
You can check a box to ignore indents when centering (a) custom separators. [You will classically prefer the custom separator to be centered on the page. Choose this option to do so.]
You can also choose a custom font for your separator. (This may not work for Ebooks.)

Blank Line Separators (see above in red) These apply to individual blank lines within the Compile Output as opposed to other 4 Separators (Page Break, Single Return, Empty Line, and Custom) which are applied in between the various individual documents being merged into a single document.
The Custom Separators between individual documents can use the same symbols as the Blank Line Separators if you want to.
In the course of a scene there can be scene breaks, change of a point of view, a change of location, or change of topic. These can be indicated by a simple blank line or a blank line containing a centered symbol or image.
Some formats, such as submission manuscripts, require a clearer signal of such a break than a mere empty line, and commonly use (#, ⁂, or ***) to do so.
These centered symbols make it easy to identify a scene break, scene transition, or change in topic.
Note: The Blank line separator option is only available to Section Layout Types, and NOT to the default Folders and Text files.
If you prefer empty lines for such breaks instead, then use the method below to accomplish this when you compile.
Open File > Compile... and double-click on the Compile Format you want to alter to edit it.
Select the Separators tab in the left sidebar of the compile Format Designer window.
Examine each of the Section Layouts in the list you are using for the current Compile output, and clear the text field of any hash tags or other symbols in the Blank line separator field.
The checkbox for Ignore blank lines using styles works in conjunction with a Blank Line separator. However, if the blank line has a paragraph style applied to it, then the compiler will presume you intended this blank line on purpose as part of the paragraph style and will NOT apply a Blank Line separator.
Using Separators:
A.) The default separators can be applied by structure to Folders (classically Acts/Parts and Chapters are typically folders in a novel structure) and Text Files (classically Scenes in a novel structure). (If the Use default separators box is checked for Section Layouts, then the default separators settings override any Section Layout separators.)
OR
B.) Separators can be applied per Section Layout. You can apply default separators or custom separators per EACH Section Layout to customize the appearance of the Compile output.
The first step towards applying separators is to decide whether you will use default separators for folders (classically Acts/Parts and Chapters) and Text Files (classically Scenes) or unique separators for certain/all Section Layouts one by one. [see below]
Let’s look at an example. Often you want Act I (II, III) on its own page by using the separator setting of a Page break between Sections. So a Page break will separate an Act from the first chapter inside it. We will see that below. (The Chapter used has an image, custom text and a custom divider attached to it as well.)

What if we want to have our Chapter appear right after the Act. You could check the Override Separator after box and change page break to a single return (see below) or an Empty Line (which gives a second line of empty space.) Here, I choose to apply this only to my Section Layout for Acts (Act heading).

Unchecking the Override separator option restores a page break between sections for my Section Layout for Acts.

Now, you can space Chapters the same way with page breaks by either accepting the default settings for folders which are page breaks. (****The default separators can be changed by you as well.) Or you can choose to ignore the default separators and set the page breaks yourself for the Chapters Section Layout. You would need to set the Page Break option for both Separator before sections and Separator between sections for your Section Layouts for both Acts and Chapters to appear on single pages.
Using the default Page Break settings for folders ensures Acts, Chapters, and your Scenes will begin on separate pages. (Classically a Scrivener novel project will have Acts/Parts and Chapters set up as folders.)

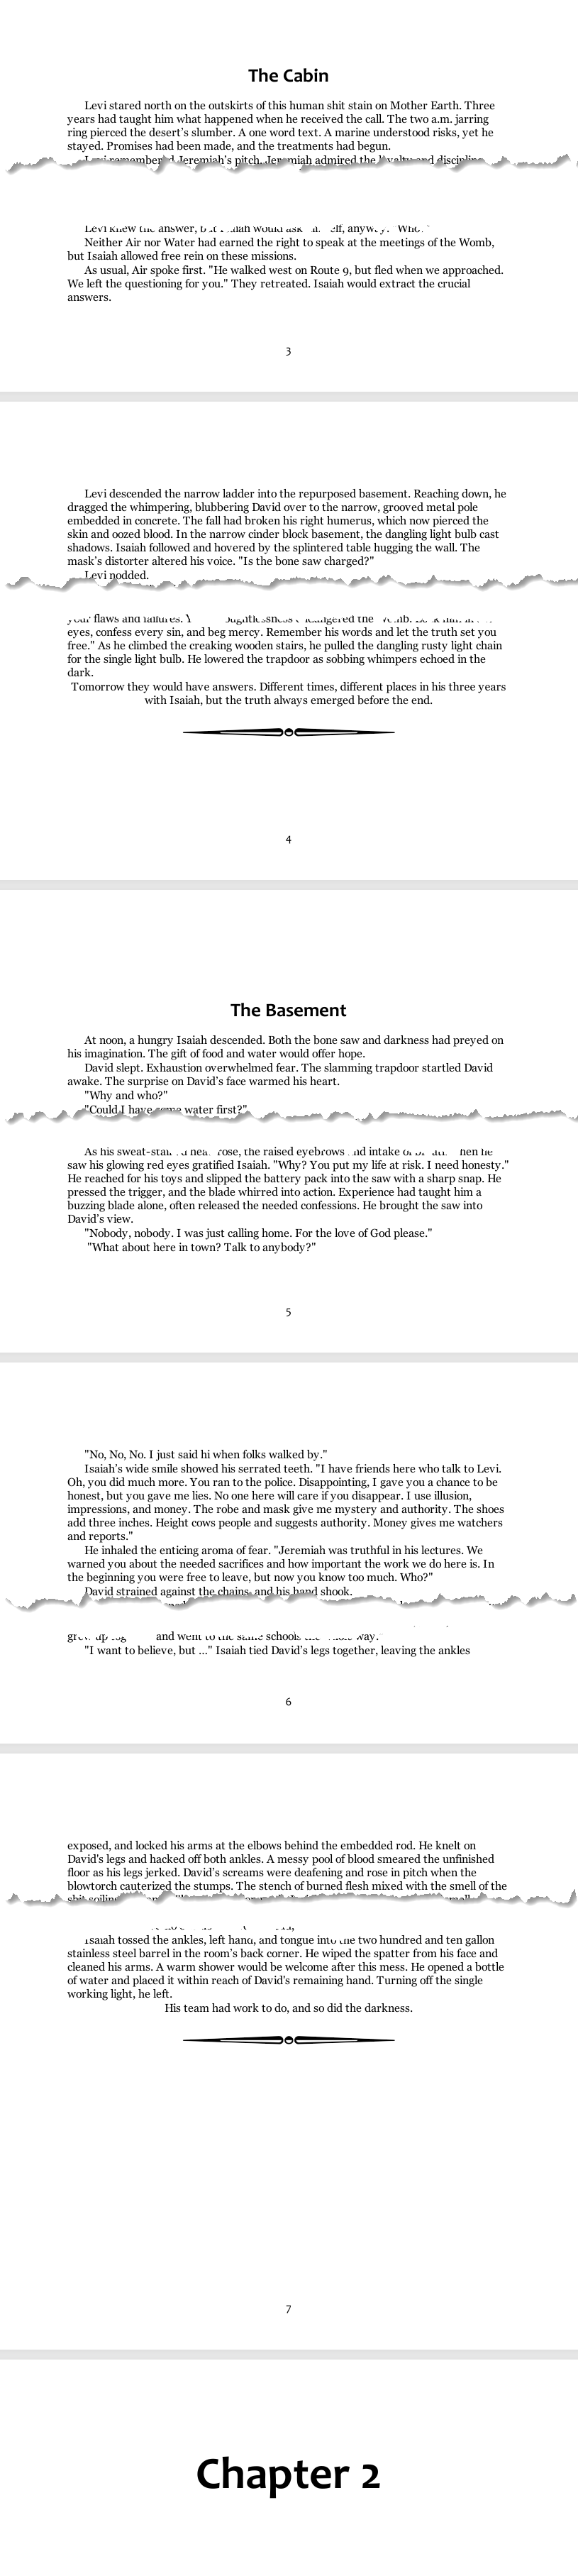
If we Compile using these settings, then we see Acts and Chapters on separate pages and the first Scene in the Chapter starting on its own page. (see below) You can achieve the same effect by using custom settings for your Section Layouts, which also use a Page Break as the separator between sections. (Modified View)

Another Scenario is where you want the Act to go directly next to the first Chapter (with an inserted image in this example) inside the Act. (see below and how I got there.)

Unchecking the Override separator after option, restores the page break for the Act document.
Another Example: Let us look at a Chapter with a custom separator and a single return as the override separator option. Using this setup, there is a single line between the Chapter’s custom divider and the Scene’s title. We can add a different custom divider between each scene as well. Choosing this option eliminates the page break between scenes and looks like this.

We can easily restore page breaks between scenes (Text Section with Heading is my Section Layout for the Scene Section Type.) by changing the Separator between sections from custom (the divider image) to a page break and will see it look like below.

You can add back the custom Scene divider seen above by using a placeholder for the divider and putting in the Scene Section Layout. (How to do this is discussed in the series of blogs on Section Layouts.)
For each Section Layout you must choose to use the default settings for folders or text files OR using a CUSTOM group of settings for a specific Section Layout you have created or modified.
When using custom settings, ALWAYS uncheck the Use default separator box in the top right of this interface.
Always hit save after you make changes.
*** If you have a custom separator but choose to use a different separator option like a Page Break, then this will replace the custom separator as the separator you will see.
Now let’s say we want a page break between Scenes AND a divider how do we do this?
1. Open the Section Layout area in your Compile Format Designer and choose the Section Layout you have chosen for your scenes.
2. You want to add an image placeholder for the divider which will appear at the end of the Scene.
3. Click the Suffix tab and check the box to Place suffix after subdocuments so the divider will be below the text.
4. Use the format bar to center the placeholder if you want.
5. The image placeholder in this example is <$img:Divider24;w=300;h=Height;ebook=60%> Let’s break this down: The placeholder tag for images is <$img: followed by the exact name of the image file in your project (or path to the file on your computer) the other settings are not needed but can be used to set a fixed width or height and ebook percentage. (see an example below where the image name in the project is Divider24.)
You could also use a Custom Metadata entry (In this example it is called Image and is a text list of Image names stored in this project in the Research section and whatever image you choose for a Chapter (even a Scene) will be inserted with a tag like this.)
This could look like this:
<$img:<$custom:Image>;w=WIDTH;h=300;ebook=60%>
<$img: This is the image placeholder tag.
<$custom:Image> This is the placeholder for a custom metadata entry called Image. This will pull in the current custom metadata entry in the Inspector Metadata area and insert the image where the placeholder is.
w=WIDTH;h=300;ebook=60% These settings are not needed but can be used to set image size or percent of the ebook page which will be occupied by the image. This is usually expressed as a percentaage because of the varying screen sizes/devices that can read ebooks. You will pick a number for the height or width, but this can be adjusted based on the appearance when you do your quick Compile test outputs.

Using Placeholders:
You can use placeholders to insert images (unique images or dividers) between Section Layouts of a specific type.
Below is an example of using a single image (in the Binder) for a divider between sections-
<$img:Divider24;w=300;h=Height;ebook=60%>
You could use a custom metadata list to vary the image/text which appears depending on what metadata value you assigned to a document. (For example, each act of your novel could have unique custom dividers between scenes.) Here you could choose from Custom Metadata Images, Shapes, or Dividers to use as an image/text to insert.
The example below adds images based on the Custom Metadata value assigned to each document. The specific image/text being inserted will not be previewed in the Section Layout preview area; you will only see the location of the placeholder and its alignment. So you could have Custom Metadata lists with multiple values that can be chosen under the Images, Shapes, or Divider lists.
6. Close the Compile Format Designer after clicking save, and the Section Layout area will show a preview of what you have created.
Let’s see what it looks like as the finished product.
You can override the default settings by UNCHECKING the box to Use default separators at the top of the right most column (see below).
When choosing a Section Layout, additional options inside the Orange boxes become available including choosing to use default separators or use a blank line separator any time a blank line occurs in the Section Layout. You can apply the two additional settings in the white box your Section Layouts.

If you choose the Custom option, then you can insert placeholders to add text, images, or dividers for any of the Separator options. These options can also be used for the Blank line separator as well.
To edit any information added as a custom option you must choose the custom dropdown, or check the Override separator after checkbox to be able to edit the custom information you previously may have added to these fields.
*** and the Asterism Symbol ⁂ are classic dividers (both can be inserted in the Blank line separator or Custom separator option). These are classically used to indicate a change in the POV character, location, or time during the course of the Scene.
Double clicking a Section Layout name in the Separator tab below will allow you to rename any Section Layout and these changes will be reflected in the Section Layout tab of the Compile Format Designer as well. You can also click and drag any Section Layout here and change the order of the Section Layouts which also be reflected in the Section Layout area. This can be useful to have your currently used Section Layouts arranged at the top if you have multiple unused Section Layouts available to choose from.

Note: below the Section Layout section are + and - signs. You can use these to add or delete a Section Layout from this interface. Clicking the Plus sign will duplicate the currently highlighted Section Layout and the default name for this duplicate Section Layout is New Layout. This can then be tweaked or renamed in the same way as in the Section Layout tab. IF YOU DELETE a Section Layout you CANNOT undo that action so be careful. The Section Layout will be removed entirely from the current Compile Format. (Backup your Compile Formats before making major changes.)
Pro Tip: You can click and drag the order of Section Layouts here to change the order of the Section Layouts in the Section Layout tab. The option to change order does not exist in the Section Layout tab.
This can make it easier to see which Section Layouts you are using when you Compile. The assigned Section Layouts will be bolded and say what Section Type you assigned them to in the Section Layout tab. (see below)

Separators tab

Section Layouts Tab
Pro Tip: Before making major changes to the separators in a Compile Format do one of two things:
1. Backup the current Compile Format by exporting it to a designated folder. While in the Compile Panel, right-click on the Compile Format and choose export.
2. Or duplicate your current Compile Format before making changes. This creates a new Compile Format with the name copy at the end. Just rename it after you make changes and are happy with the changes. Now, you can rename this Compile Format copy with a descriptive name or add a version number to the original Compile Format name. It can be hard sometimes to know how to reverse the changes/retrace the steps you made in changing a Compile Format to get back to the original one. Duplication gives you an easier path back to the original Format, as you can duplicate multiple times as you make changes if you want and delete the duplicates when you are satisfied with your Compile output result from the new format.
Pro Tip: To be able to quickly see the results of choices you make in the Compile Format Designer, use a Compile Collection.
A Compile Collections is a mini version of all your book elements to test the Compile Formats ahead of your publishing (or other) deadline to work out the kinks.
Your Compile Collection should include at least one Act/Part, probably two Chapters to show correct numbering, and multiple scenes next to each other to work on spacing (your separator choices) between scenes in a chapter if you use a Chapter and Scene Structure.
Separate from the Compile collection in the third panel of the Compile Panel you should check the option to include your Front and Back Matter
[You may want a different numbering scheme for these such as small roman numbers [If so, use this placeholder for these pages <$p-r>] in the header or footer based on your preference for your Front and Back Matter pages. Headers and Footers are set using the Page Settings Tab in the Compile Format Designer.
Having a small slice of the future book to practice on allows you to fine tune the appearance of the Compile output by a rapid compile of this small Collection and making adjustments as you go. You may need to experiment with multiple tweaks to get the appearance you want.
Pro Tip: You can use the free windows snipping tool to capture images of the settings that work for you to remember as you make adjustments.
Use the keyboard shortcut Windows logo key + Shift + S to open the snip app.
After you capture a snip, select the Save Snip button.
In the Save As box, type a file name, location, and type, and then select Save.
Your Separator choices and what they mean with examples.
Note: If you use the As-Is Section Layout for your Front and Back Matter material, then each item in the Front and Back Matter appears on its own page and this cannot be adjusted.
Using Scenes with Page Breaks (before and between)
Note: If there is a custom separator between Scenes currently, but you change to Page Breaks between Scenes, then the Page Break option replaces the previous choice of a custom separator. (Choosing the other options of a Single Return, or Empty line will also replace the custom divider. The option to use it still remains, but you must rechoose the option of a Custom Separator to see it reappear in the compile output.
The custom separator was <$img:Divider24;w=WIDTH;h=80;ebook=60%> (Here- Divider24 is the name of the Scrivener image you are inserting when you choose the Custom option. The h=80 sets the size and can be adjusted based on how you like its appearance.
In the example below the custom separator has been replaced by a Page Break. However, the images below show a custom image divider inserted after scenes. This used the same image as was used for the custom separator, BUT used an image placeholder in the Scene Section Layout to place the image after the text in the Scene. Using this method results in a Compile output that mimics the look of a custom separator, but this is accomplished outside of the Separator process. (As often happens in Scrivener there are multiple methods to get the same result. Which one you use is your choice.)
The Separator you are seeing in the example below is included with the Section Layout for scenes you are currently using and is not involved in the Separator process. [The Page Break option ignores the custom instructions in the box to its right in the Separator between sections.]

Scene with Single Return (before and between scenes)
[Using the option of an Empty Line instead of a Single Return would add an additional line of blank space. The Single return option overrides the custom separator to its right.]

A placeholder in the Section Layout for scenes shows the divider image, which mimics the result if you used a custom Separator. Using the image placeholder instead gives you the freedom to choose from multiple separator options.
Act with Override Separator after which is set to the Empty line separator choice. (see below)

For Acts/ or Chapters the Separator between sections setting does not normally come into play as in a normal novel you would not have two acts or chapters follow each other back to back.
***If your novel is only organized as Acts and Chapters, then this setting would effect spacing between consecutive Chapters.
In the example below, the Chapter Section Layout is set to have a Page Break, but the Scene is using the Override Separator after choice of a single line. This means the item following a Scene is only separated by one line, and this supersedes other seperator instruction from the chapter in this example. (The divider included at the end of each scene is placed using a placeholder in the Scene Section Layout.)


Here the Override separator option after a scene changes the default Page Break before a Chapter option and replaces it with only a single return before the next Chapter Header and eliminates the normal page break before the next Chapter Header.
You could however change the Chapter Headings settings to have a page break before, but use the Override Separator after to be just a Single Return (one space) or Empty Line two spaces and this arrangement before starting a Chapter’s first scene and this would look like below.
You might choose this option if you want the first Scene title in a Chapter to appear right below the Chapter Header.

And would look like this with page break before the Chapter Heading but not after where the Chapter Heading Override separator after setting forces a single return before the Scene Title and text.

Now, what if we use the Override separator after option for the Section Layout for Acts and this time change the separator to an Empty Line (two spaces). Below are the settings and the results.


This may be useful when submitting to an agent and they want the first “X” pages and you don’t want all the normal page breaks to bloat your presentation and decrease the amount of material you send.
Let’s Look at Front and Back Matter
You have to consider how to number Front and Back Matter pages. Does your book start on Page 1 after the Front Matter. If you are using a Compile Collection, then you need to check the boxes to Add Front and Back Matter. (Do NOT include these in your Compile Collection itself.) This looks like the image below.

You can begin counting pages with your Front Matter or use different page footers (or headers) for the Front and Back Matter. This is done using the Page Settings tab of the Compile Format Designer.
Now look at Headers and Footers to make adjustments to your headers in both the Front/Back Matter and body of the Novel.
Here is one way to set this up using small roman numerals for Front and Back Matter pages [The Placeholder for small roman numerals for the Front and Back matter is <$p-r> as shown below.


Front and Back Matter traditionally use the As-Is Section Layout. There are no Page Separator settings for this type of Section Layout. Every page in the Front and Back Matter will be presented on its own page (ie a page break). In this situation I want my Compile Output to start the Book with page 1 when the Novel text starts so I unchecked the box for Page numbers count first pages (see above). Doing this ensures that your book’s page count starts AFTER the first pages in the Front Matter section(see above). Below you see what you get with these settings.
(Modified for viewing with the actual pages shortened for this illustration.)
In this example, both the Act pages and Chapters pages have single returns set to occur after each which is why this appears so compressed.

The Blank Line Separator:
This option is only available for Section Layout Types, and NOT for the default Folders and Text files separators. This setting will transform blank lines found within individual chunks of text in the editor of the chosen Section Layout Type. In the example below *** would be inserted if a blank line occurred anywhere with the Scene Section Layout during the Compile Process.
Some authors (myself included) will manually add symbols like *** at the point of scene/POV transitions themselves as they go, negating the need for adding a blank line Separator.

If we use this setting for any blank line in a scene (the classic situation where this would occur in a novel), then every time you use a blank line to indicate a change of POV, location, or scene transition, the text symbol *** would be inserted as shown below.

I have purposely been repetitive and demonstrative with going thru various scenarios, because initially the concept to Compiling can be overwhelming. I hope this dive into separators eliminates some of your confusion and fears.