How metadata can Help you Write
Metadata is structured information that can label, locate, and help you manage your data. You can create Project Templates with preset Metadata for specific needs to be used again and again.
Scrivener Metadata can be exported, imported and printed.
Metadata categories include:
1. Titles
Appear ubiquitously.
2. Synopsis
Appears in the:
Corkboard: Displays in the content area of the Card
Outliner: Appears beneath the Title (if you choose to display this)
Inspector: Found at the top of the Note’s tab
Quick Reference Panel: Will display if you choose the Synopsis option from the drop down on the right-hand side of the header
3. Labels
Label Facts:
Values can be changed via Project Settings and are UNIQUE to each project.
Only One value per document at a time.
Values can be changed or edited either in the Project Settings Panel, Inspector Footer, or in the Outliner if you choose to display the Label column. Choosing the edit option for Labels anywhere in Scrivener will open Project Settings to the Label tab to edit an existing value, change a color, add a new label, or delete an existing label.
Labels are Project Specific, but can be copied into another open Project Settings Panel in another Project.
Labels can be visible in the: (You have the option to display or not)
Corkboard- Either along the edge of an Index card or by using the Label color to tint the entire card. You can choose to display both or neither.
Outliner- Labels will appear as color dots, UNLESS you choose the option under the Menu command View > Use Label color in > Outliner Rows. If you choose this option the whole Outliner row will display the Label color whether or not the Label column has been chosen to display.
Inspector- In the bottom left footer with both the color and title of the label.
Quick Reference Panel- In the right side of the footer you will see the Label name and its assigned color which mimics the appearance in the Inspector footer.
The Binder- As either a colored dot or filling the document’s title bar in the Binder. (If you choose)
Icons- These can also reflect the label color, but this does not display well.
Scrivening Titles- These can also display the document’s label color if the option is chosen.
Note: Label colors will print in Outlines or Corkboards if required. Use the Menu command View > Use Label Color in- to choose your options.
4. Section Types
Crucial for how the Compile output ultimately looks. These values are used to connect Section Types with the Compiling Formatting Section Layouts which control the appearance of various Scrivener documents.
These values can be the default based on the Binder structure or you can create custom Section Types per project. These are searchable and the data can be displayed in the Outliner, the Inspector’s footer, or the right side of the Quick Reference Panel’s footer.
5. Status (change via Project Settings)
Status Facts:
Can’t be color-coded
Only One value per document at a time.
Untitled snapshots will include the current document Status in parentheses in their title. (see below)
This value can be altered from the Inspector’s Footer, Outliner Column (if displayed), or in the Project Settings Panel.
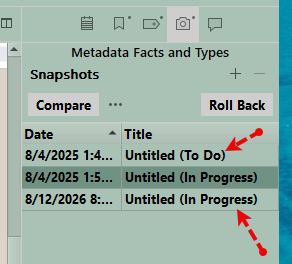
The Status for a document can Appear in the:
Corkboard card as an optional stamp across the face of it (Use the Menu command View > Corkboard Options > Status Stamp. The stamp’s opacity can be adjusted in the Options panel under the Appearance tab.
Outliner if you choose the option to display a Document’s Status in an outliner column.
Inspector’s lower right footer, with a dropdown menu to change its value.
The Quick Reference Panel will also display the Status on the right side of its footer bar.
Labels, Keywords as color chips, or Binder Icons could be used to supply visual information on the Status of a document.
6. Keywords
Keywords Facts:
They are searchable metadata tags.
An Unlimited number of keywords can be applied to a single document. (Unlike the other previous Metadata which can only have one value per document.)
You can drag one or multiple (at once) keywords from one project to another either by dragging and dropping the keyword onto another Project’s Binder Document title, Inspector’s Metadata panel, or another Project’s keyword panel.
You can search for multiple keywords at once in the Project Search if each keyword is separated by a space. NOTE: To search for documents containing particular sets of keywords, then the Search Operator must be ALL words.
Keywords can be organized and changed globally via the Project Keywords panel.
Keywords Can Appear in the:
Corkboard as colored strips on the right of index cards
Outliner if you choose to display keywords. These can be listed by their name or represented by a color chip.
Quick Reference Panel if click the caret on the far right of the header bar. (Keywords is one of the options to display in the lower half of the QRP.)
And of course in the Inspector Metadata Pane.
7. Custom Metadata (The various types are discussed in detail in another blog on this site.)
Types:
Text
Checkbox (Yes/No)
List
Date
Custom Metadata Facts
Entry Values can be globally changed except for freeform text fields and custom dates.
Each Custom Metadata tag added can be added to the Outliner view as a separate column.
Each Custom Metadata tag can be searched for in Project Searches.
Each Custom Metadata tag is visible in the Inspector’s Metadata pane though you may have to scroll to see all the entries. Just like Status, no colors can be assigned to Custom Metadata.
These can be transferred into another project’s open Project Settings Panel (to be used in another project) BUT NOT directly into the Inspector like with Keywords.
8. Document Dates:
Metadata about when a document was created, or modified is created by Scrivener automatically including the time of day.
The date modified or created can be searched for in the Project Search Panel. (This is discussed in another article.)
This information can be shown in an Outliner column, which can have the files presented in their Binder order or in ascending or descending order based on the modified or created date for the document. Clicking through the options will return the Outliner View to the Binder order view.
This information is also available in the Inspector under the Metadata Pane. This will change in real time if you write inside a document. (The time modified will change by the minute depending on when you last typed.)
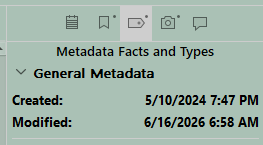
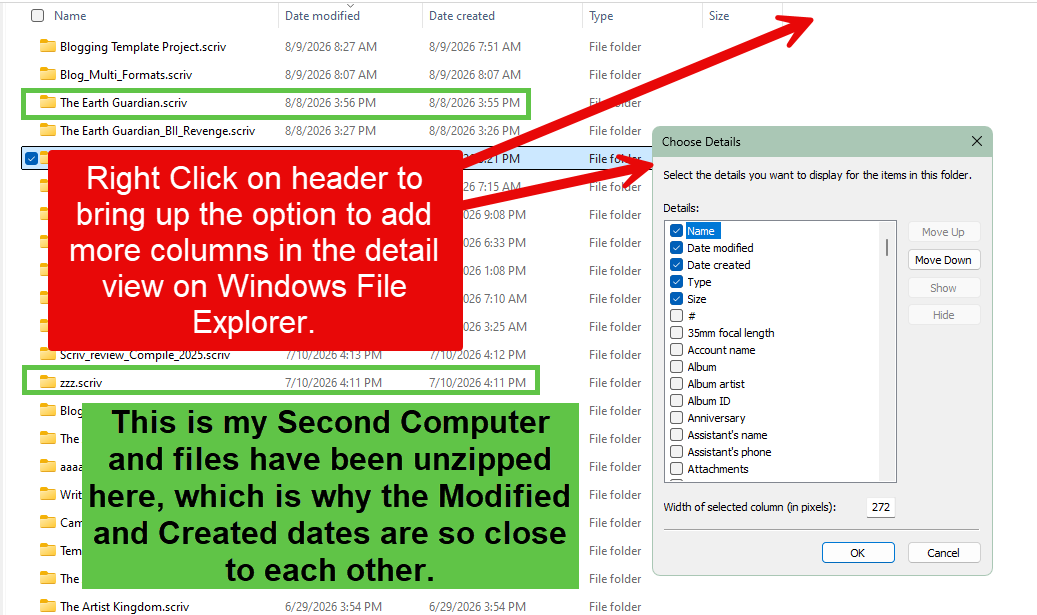
You can also see this information for the Scrivener Project Folder by using the Menu command > File > Show Project in (Windows) File Explorer. You may need to add the Creation date to the details view columns to see this information. (see below)
Three Other Pieces of Information which are NOT Metadata but can be exceedingly useful.
A. Icons
These are not considered Metadata and are not searchable.
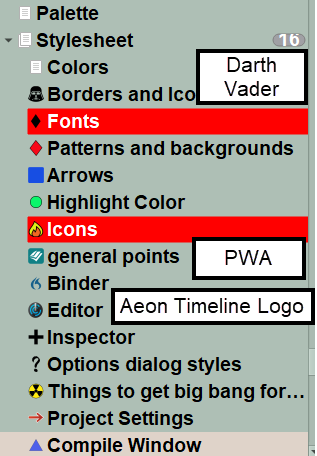
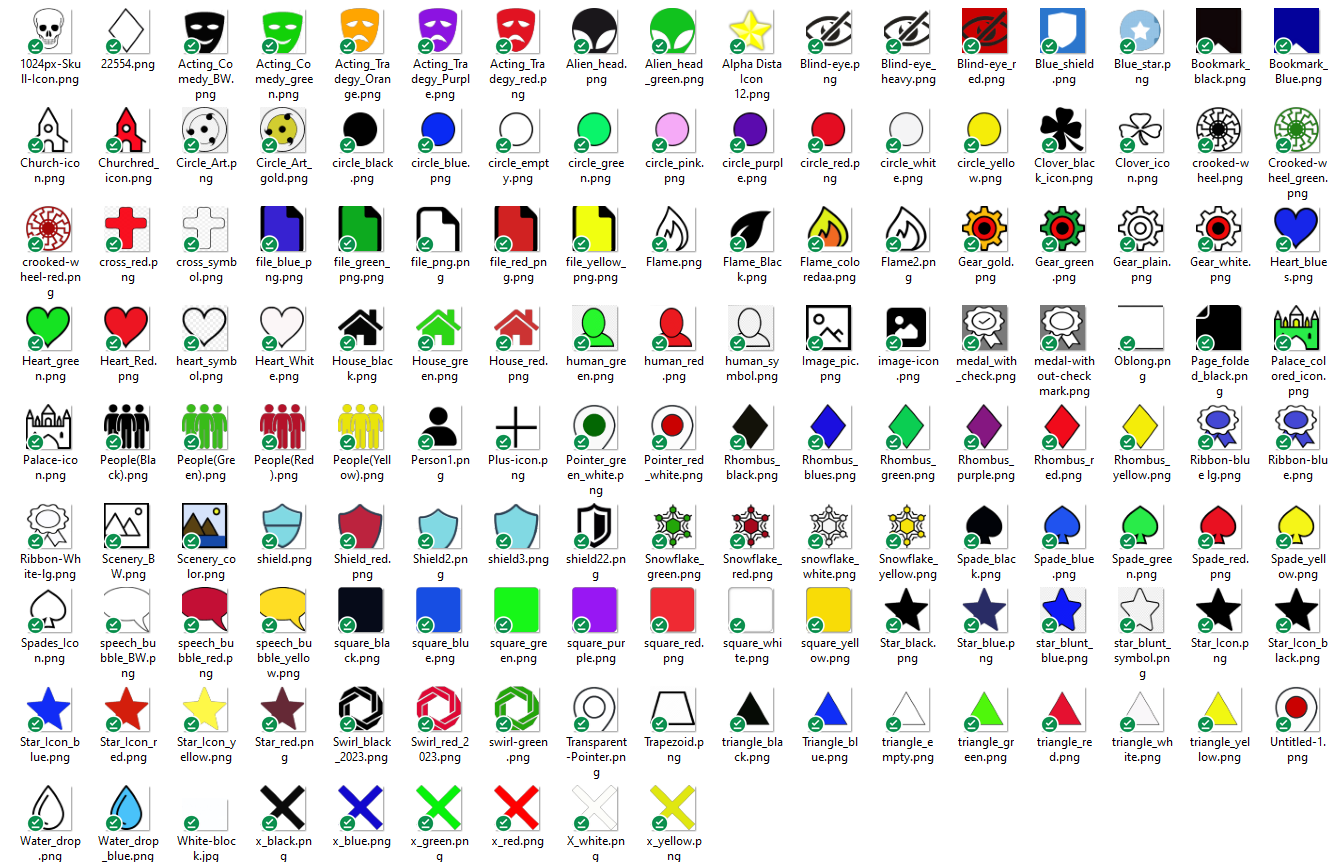
However, they can also like Labels be used as visual information. Any png, ico, or jpg file can become an icon. Due to the small icon size in Scrivener, simple shapes (like geometric ones) work best. The same shape can supply different information on your progress by using different colors. (Green, Yellow, and Red) Icons could be character specific, or be related to something like your current editing status. I have used program icons like Prowriter’s Aid Icon to indicate the scene had been edited with the program. As with Labels, the meaning of the same icon and color can change based on where you are in the writing and editing process. Their use is only limited by your imagination. I use them to supply visual information about POV or editing status, which frees Labels to provide another visual bit of information on a single document. Simple geometric shapes can easily have their colors changed in simple paint programs to create groups of distinctly colored icons. (see below)
B. Bookmarks
I would also add Bookmarks which are not Metadata. They provide a way to quickly link important information across the current project (Either in Project Bookmarks (system wide), or Document Bookmarks (file specific)). These bookmarks can be tied to external files, internal project files, or even linked to files in other projects.
For example a Scene occurring in New York City with John where he visits Tina, could have bookmarks to my location files on New York City, as well as Character bookmarks to both Tina and John. I could add a bookmark to the previous scene the POV was in, such as a scene containing a flashback.
So though not Metadata, Bookmarks can tie key information to a particular scene/file. This place useful information at your fingertips including links to particular world building information, character bios, location information, editing resources, or research information. This information can be viewed in Inspector notes, a Split Editor view, or a Quick Reference Panel to support you while writing scenes.
Thinking about how you could use these different types of Metadata information (and others) before starting your project/novel can allow you to tag your documents as you write.
C. Comments/Footnotes-
These can be used to highlight key scene moments in the current scene or those aimed at past or future scenes. You could also note a story area needing more work, or note a theme which needs more attention. These can be easily removed during the Compile process.
Why do this as you write?
1. When you first finish a scene, the details are fresh and it is easier to add keywords for every character, location, themes, clues, or magic items. You should link the relevant information for the scene using Bookmarks.
2. Adding this extensive network of metadata allows you to analyze your writing or find minute but key details with ease as the story progresses, if you need to recall earlier information, or later when you need to fix plot holes.
3. Waiting until the first draft is completed will leave the daunting task of adding tons of information to later. This often leads to a sense of frustration and exhaustion. Also doing it all at once will result in cutting corners as you rush to finish this process. Doing it everyday after writing one or more scenes keeps the task manageable requiring less then 5-10 minutes to finish.
Time spent here developing which metadata would be most helpful such as keywords or custom metadata for every character, location, clue, etc will help save time later. A personal suggestion is to combine this with comments. This allows you to highlight key information in a document/scene such as a character introduction, backstory, a crime clue, or theme element you have introduced into your story. With the specific point marked by a comment, then when you find the scene you are looking for, the comments can direct you to the exact point where the information appears. Even the comment color can be customized as to what type of information it is highlighting. You can have up to 16 custom colors to use for Labels, highlighters, and comments. You could even save a key for each project on how you intend to use your custom colors. Do you have a custom color for each POV for their Label and any Comments involving them?
I promise if you spend time doing this before starting the first draft and inputting the information as you write will return immense benefits during the editing process.
8/15/26