Scrivener themes and customization part 2
When creating a Theme’s Appearance you should go through every tab in the Appearance section of the Options Panel. Experiment to discover the visual environment which will support your writing.
Saving Themes
To create your own unique theme, first pick a theme other than the default option that is closest to what you want and make changes to customize the appearance. Now, use the Manage button and use the Save Theme Options to file and name the resulting new Theme and save a copy in another folder. Consider saving themes and custom themes in a cloud folder, if you work in multiple locations or use multiple machines. If you apply the theme to Scrivener, then the theme is saved in the Scrivener support folder in a folder called themes. You may need to restart Scrivener to see the new theme appear in the folder below.
Changing the Fonts and Size of Menus in a Theme
Below are the areas in the Options Panel where you can change the interface fonts.
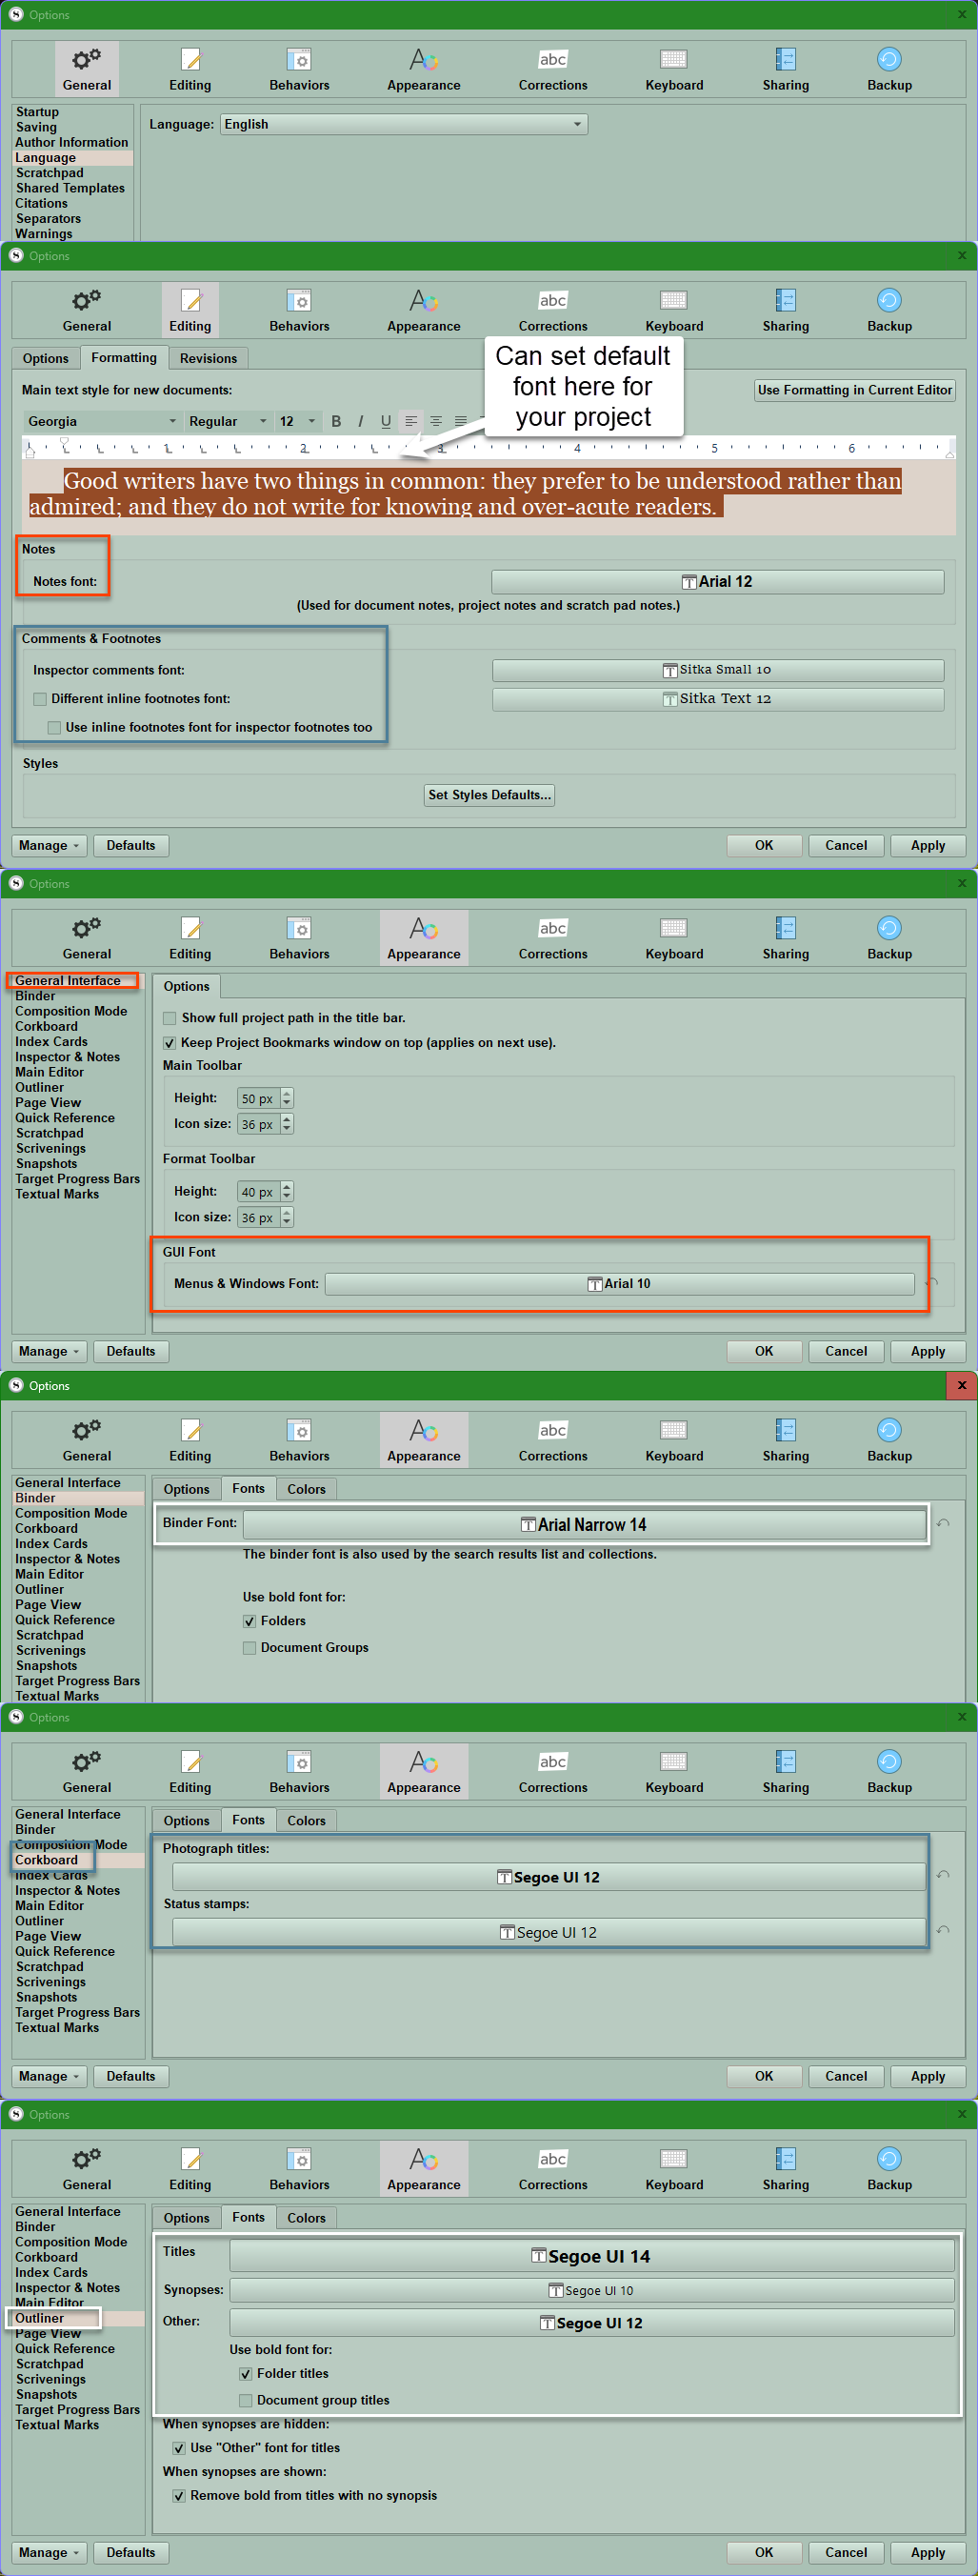
You can also change fonts in the Project Settings Panel.
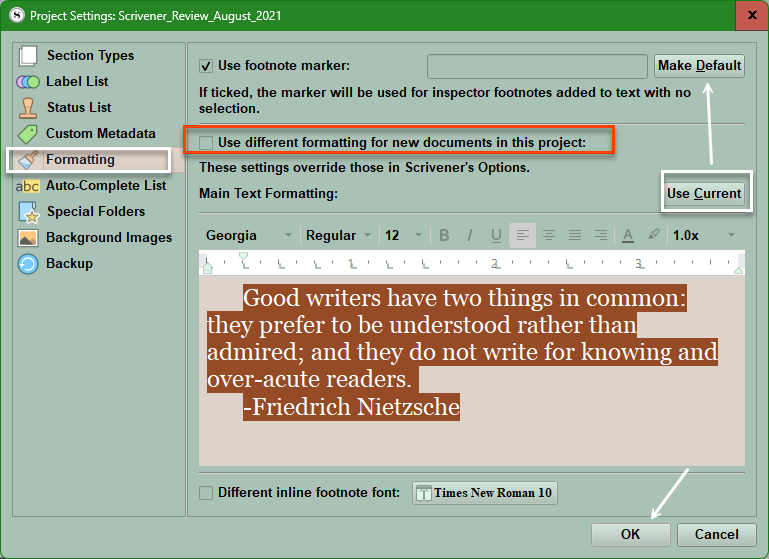
Use the Menu command Project > Project Settings > Formatting Pane. Here you can take a document’s formatting after you change it to be what you want and then apply to the whole Project. Remember, the default formatting is given the name No Style by Scrivener, because this default font can be changed easily at the time of Compiling. Font changes here can complement your Theme, but are not part of a theme package.
Adding or Changing Backgrounds in Scrivener Themes.
Each of the three Corkboards can have a unique appearance if you choose the custom background option. Choose the Appearance tab > Corkboard > Colors. Installing the theme itself will not change these, but you can include custom files with the zip file containing the theme when you share it with people, so they can add specific custom backgrounds to work with your theme.
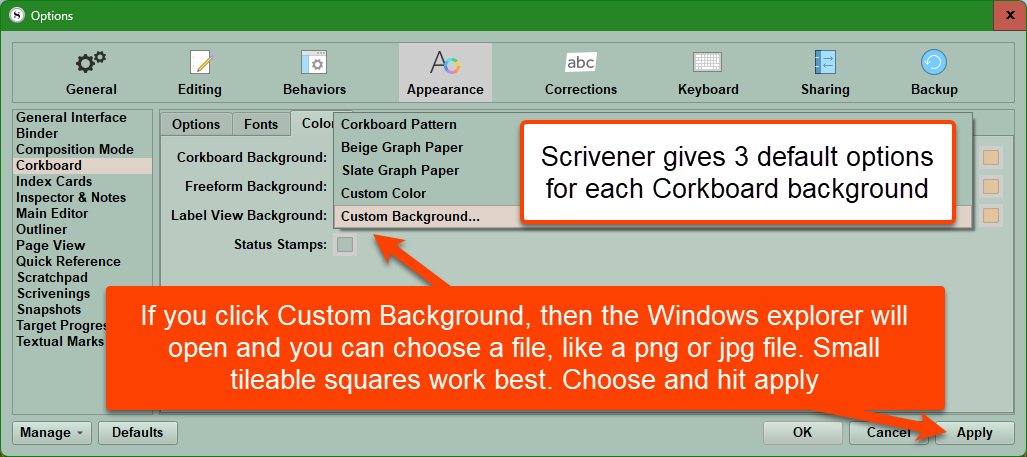
Here is an example of using a small, scalable tile to create a custom background.

Note: The Freeform Corkboard can also be changed in the Project Settings Panel under the background images tab. (see below)
Use the Menu command Project > Project Settings.
Setting the Editor Background Image: This will only be visible if your Editor has a fixed width narrower than the available Editor window. (Otherwise, the image will not be visible even if installed.) You can use repeating image tiles here as well as shown in the example below.

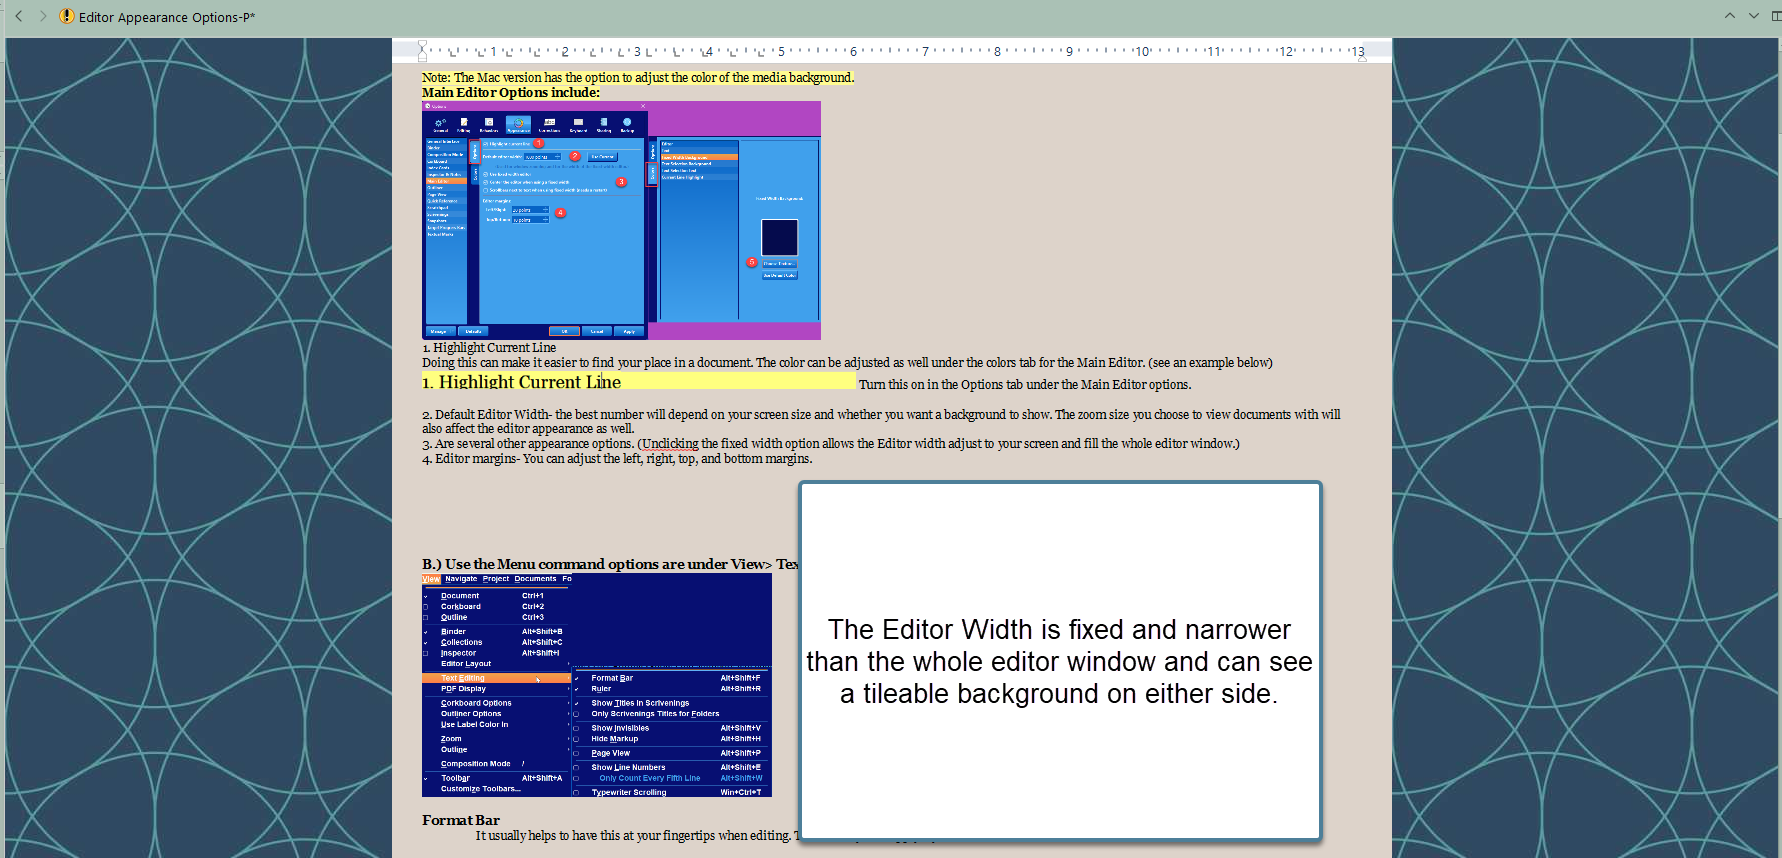
Scalable background tile with a narrow fixed Editor Width.
The above example uses a scalable repeating tile to create a seamless experience.
*** Again, remember to include any images used for your theme in the zip file you give people so they can get the complete theme experience.
Setting a background for the Composition Mode.
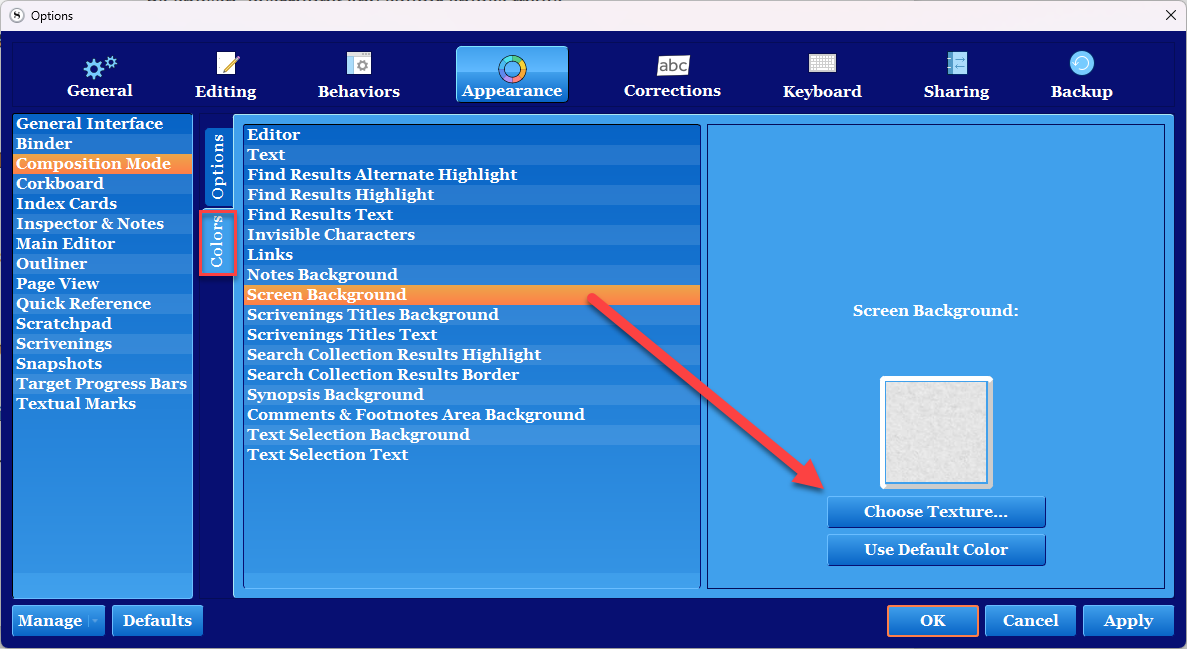
1. Use the Menu command File > Options > Appearance > Composition Mode. Now click on the Screen Background and Choose the Texture button and choose a file for the background. Background tiles will work here but NOT when used from inside the Project Settings panel.
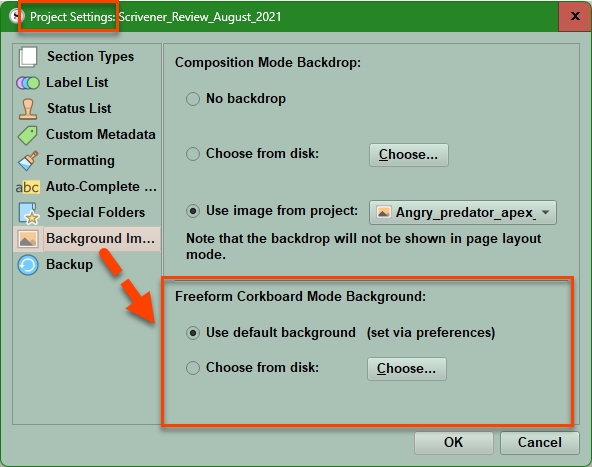
2. Use the Menu command Project > Project Settings.
You must do this inside the Project Settings Panel and the Background Images tab. You have three options.
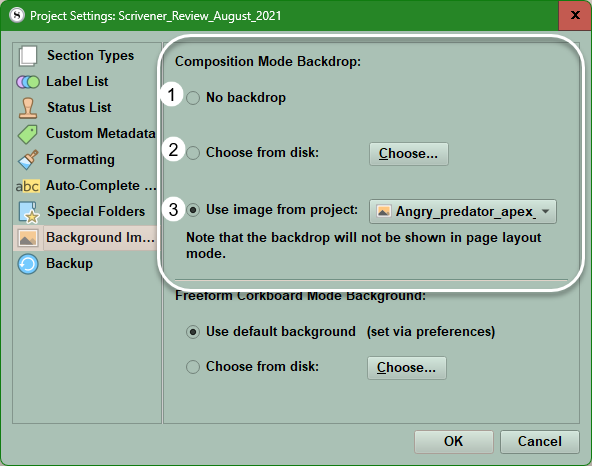
#1 Choose No backdrop and there will be no backdrop, and the appearance will default to the options set in the options panel under Composition mode.
#2 Choose an image from your computer. The clarity of a full-screen picture will be dependent on your monitor size, as small images will be scaled up to fill the screen and can cause distortion. Scalable tiles will not work here. Click on System > Display and click on a monitor to see the display resolution detailed under the Scale and Layout section. Using a small tile here will result in it being expanded to fill the whole screen with a single small tile.
#3 Use an image stored within the Project.
The View Menu Options
The Options Panel is the main place to change elements of your current theme or customize a newly imported theme. However, many options which affect how Scrivener looks and functions fall under the View Menu command. These are not included in either a Themes or Options file, but can be saved as inside a Project Template which will preserve these settings. (View settings are NOT global, but are Project specific.) Many of these settings can be saved using the Layout Manager to rapidly change between various arrangements of the interface.
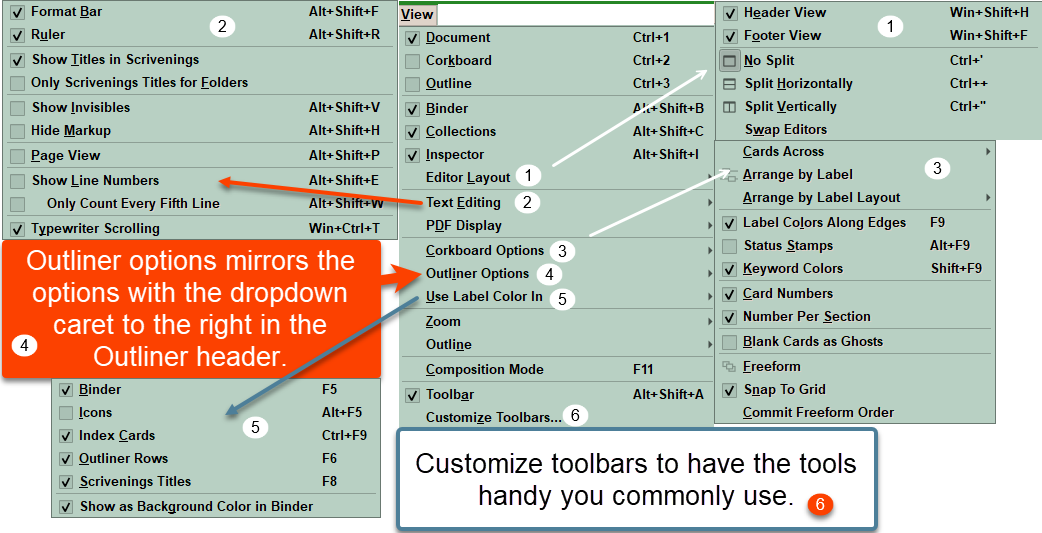
#1 Controls the settings which affect Editor appearance.
#2. Controls how the Editor functions and what tools you use with it.
#3 Adjusts your Corkboard appearance.
#4 Outliner options mimics the ones available on the right side of the header when in Outliner View.
#5 Details where and how label colors will appear in your theme.
#6 Here is where you can choose which functions you want to be available on the main and format toolbars.
Many other tweaks to Scrivener’s look occur from within the Options Panel under the Appearance Section and this includes the Interface fonts in the Binder, Corkboard, Index cards, Outliner, and Scrivenings titles fonts.
These things are not saved inside either a Theme or Options file:
Metadata including labels, status settings, custom metadata.
Custom Icons.
Binder structure.
Special Folders like a Scraps folder, Template Folder, Front and Back Matter, etc.
Document Targets.
Custom Backgrounds (Though background images can be stored within the Project Template to have available for various theme appearances
Layouts arrangements for your interface.
(These must be saved per Project, or saved inside a Project Template which can be reused for future projects.)
Themes can alter the appearance of any of the items listed below:
Binder-spacing/indent under options, Fonts, Colors (Binder and Search results backgrounds)
Composition Mode- highlight current line, Colors of many of elements of Scrivener, Background in Project Settings (background images)
Corkboard- Various options for cards/images on cards, Fonts, Colors-Status Stamps and Backgrounds
Index Cards- Options-change card appearance, Fonts, Colors- including card lines and borders
Inspector and Notes- Colors only
Main Editor- Options-including editor width, margins, highlight current line, Colors only
Outliner- Options-grid lines, spacing, indents, fixed row heights, Fonts, Colors
Page View- Options- center page and spacing, Colors
Quick Reference (Panel)- Options highlight current line, Colors
Scratchpad- Colors
Scrivenings- Options such as separators, title options, Fonts, Colors
Snapshots- Colors for new and deleted text and background
Target progress bars- Options, Colors
Textual Marks- Options (a lot), Colors (lot of options)
Even more extensive modifications are available if you are willing to edit the source code. See Antoni Dol’s book for windows and mac computers. (A link is included at the end of this blog.)
Themes can also be applied to custom Scrivener Project Templates.
A Scrivener Project Template can include many non theme options to change its appearance including custom icons, metadata, layouts, Document templates, and Binder folders. This project can also have a preset Binder structure designed for a purpose like a novel, or dissertation.
Scrivener Tip: For those of us whose eyes are betraying us, the answer is not to increase the font size, but use the Zoom settings in the Editor and elsewhere to make your text visible in way to avoid eye strain. This cannot be included with theme.
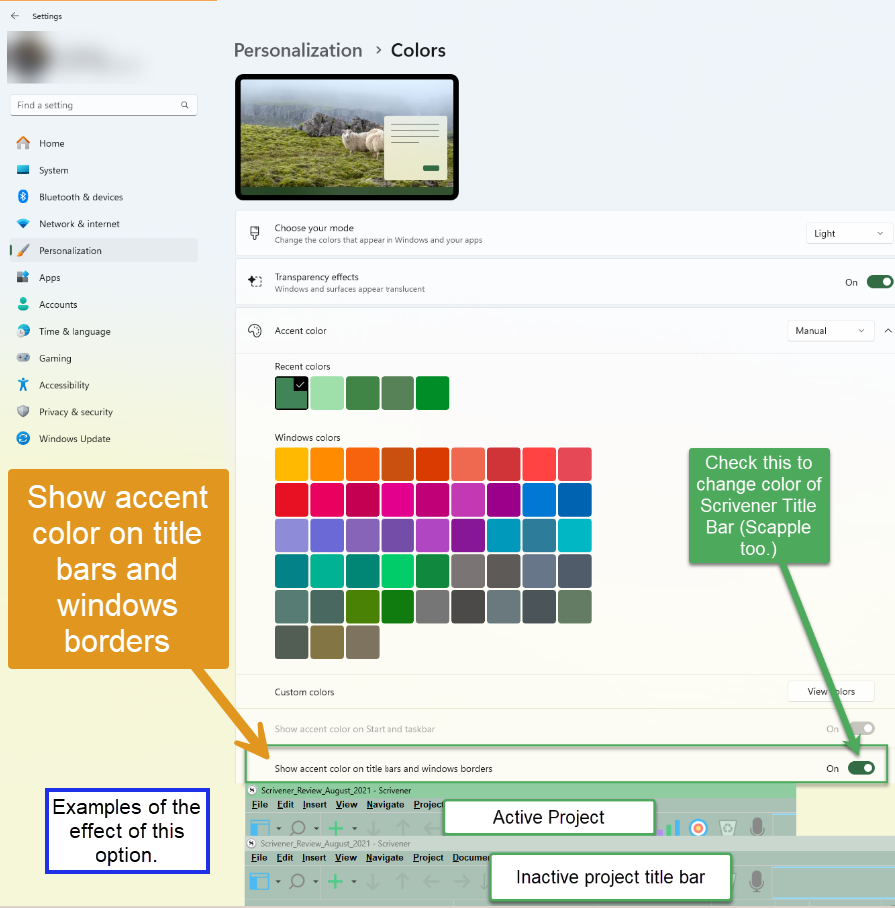
Windows Bonus Tip:
You can change the Windows bar at the top of the Scrivener Project to different custom colors to match/almost match your current theme rather than the default gray. To do so follow these steps in the Windows Settings Panel under Settings > Personalization > Colors > Accent Colors.
To Customize default or Imported themes:
1. Choose a theme to modify and change its appearance to suit your needs which comes closest to your vision.
2. After you have made changes then use the Manage button or the Windows menu to save the theme or options to a file.
3. Make sure you give it a unique name to distinguish from the original. I add mod to the current theme name or white editor, if I change the Editor window to white.
4. Now Import this saved theme into Scrivener and its name will appear under your Custom Theme list. (I suggest saving the Option/Preference file as well for the theme as a precaution.
Importing Themes -What’s the difference between Load Theme from File and Import Themes, anyway?
ALWAYS Import Themes
Well, the [Import Themes] command will copy the Theme to the application folder, and add your personal Theme to the list of Custom Themes in the Window menu.
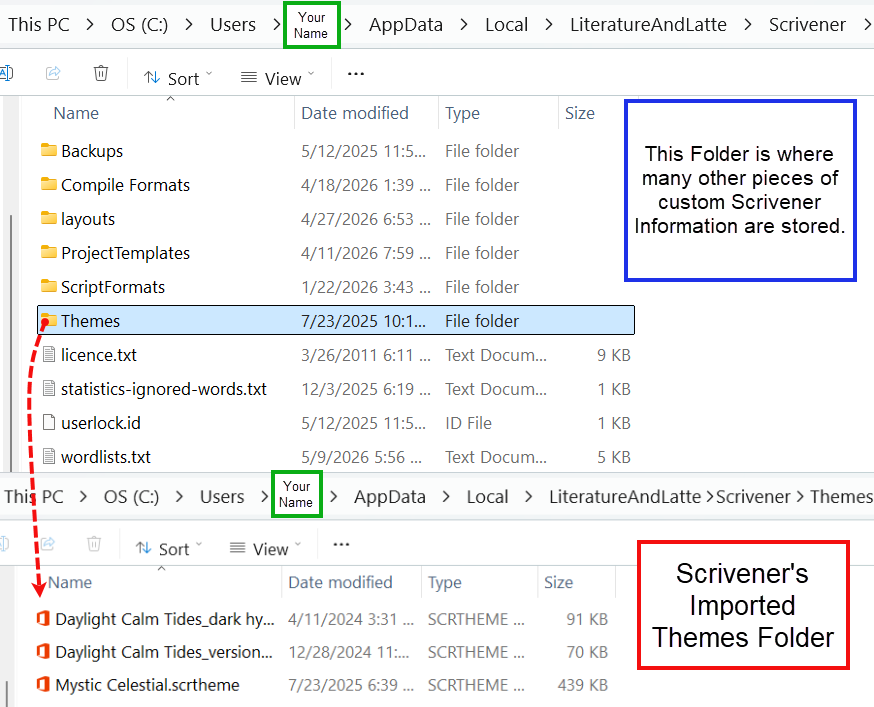
The [Load Theme from File] will only show the Theme in the menu while the Theme is loaded. The windows application folder is usually at C:\Users[your user name]\AppData\Local|Litt. And Latte\Scrivener\Themes
Saving Themes Errors-
For those having this problem when trying to save themes- i.e. the Save Theme to file is grayed out.
Try this possible solution.
SO I think I found a trick around this frustration: if you start modifying a Default Theme and make all the changes you want and then have this issue, do this:
1. Use the Save Theme OPTIONS to File menu (name it, and save.)
2. Now choose a new theme and restart Scrivener.
3. Reopen Scrivener in this other theme. From the Options Panel Manage button menu select "Load Options From File".
4. Choose the theme you could not save, and this should now open.
5. You should now be able to use the "Save Theme to File" function and save your newly created theme. Note: Saving Theme Options to file will strip out personal information from any saved theme which allows you to share a theme without any personal details.
Resources for help with Themes:
Download themes here:
Scrivener 3 White Theme (Mimics the Default theme which cannot be manipulated.)
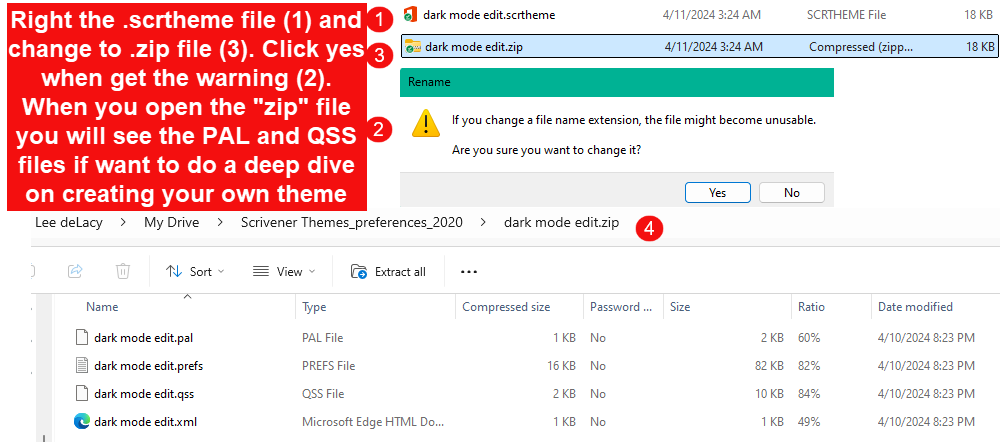
Any discussion of windows themes would be remiss without mentioning this extremely detailed book by Antoni Dol available on Amazon Mastering Scrivener Themes. This book tells how to manipulate themes below the surface level by editing the .pal and .qss files. You can reach this by renaming any Theme file by right clicking on it. Ignore the windows warning. Rename from Theme.scrtheme to Theme.zip(see below)
Common Errors with Themes
1. A Background texture file you added is heavily compressed or distorted when used in your theme.
Scrivener converts any imported textures (such as PNG files) to a JPEG format. Smaller files ensure quick responses from the Scrivener interface. You can prevent resizing by making sure the texture (this can be any image as well) is not larger than your screen resolution.
2. Theme backgrounds in the fixed-width Editor, Corkboard, or Composition mode appear upside down. (An issue in Scrivener versions 3.4 and Mac OS 14). This often can be reversed by going in and out of page view. Do this and now check your background images to see if corrected. If not, consider importing the image upside down and when reversed by Scrivener, it will appear normal.
3. Importing PNG files for Dark themes shows images with a bright background around the edge which disturbs the dark theme. A Scrivener bug will show any remaining transparency around the edge of the PNG file as bright. You will need to carefully edit the PNG file to remove any transparent edges on images you want to use in your theme. If you look at any PNG image on the Windows Photo Viewer, you will see if a light outline remains around the image before using it with Scrivener.
I hope this inspires you to make Scrivener yours and create the best writing environment you can.