the basic series-The Scrivener editor layout
If you open a new Scrivener Project you will see a clean interface as illustrated below that includes the Dynamic Editor Window in the center with a header bar (above) and a footer bar (below) with the active window in between. (Being Dynamic means the Editor window adjusts to any view including the addition of the Binder, Inspector, or split views to ensure your text is always visible and no words are cut off from the viewing window.)
Above the will first be your Format Tool Bar and above that your Main Toolbar. This is the default view to start. (see below) As you become more comfortable with the program many of these elements can be changed to suit your preferences. (Dynamic editor function means the text will compress to show all the text in the document even if shrink the margins.)
The Interface of a New Scrivener Project.

The Binder and Inspector can be removed by using the menu bar and View> and unchecking their boxes.
The Header and Footer can be removed as well by View> Editor Layout> and unchecking the Header View and Footer View. However, doing this will remove many valuable Editor tools from easy access.
The above window is the classic Editor window, but you can also see three other Views.
1. Scrivening- Here all selected files are viewed as one and you can move between files by moving the editor window up or down. Each file will have a separator and title.

Border between files in the Scrivening View.
2. Corkboard- Which resembles a collection of Index Cards

3. Outliner View- Which looks like the title says.

An Example of a the Outliner view of a folder and its subdocuments.
If you click inside the classic Editor window, you can begin typing right away. However, we will talk about some useful things to consider before starting. You can set your formatting for writing for the project in Project Settings. This can be reached by using the Menu command Project > Project Settings. This will bring up the Project Settings Panel and you can click on Formatting.

The Active Formatting option is highlighted in orange.
In the beginning you can start with the default settings from Scrivener and easily change later. Once you have chosen a preferred font, size, spacing, pargraph indent, etc then you can change your work to your preferred font settings by highlighting all your documents and then going to the Menu command Documents > Convert > Text to default Formatting. This will change your existing documents to your chosen default font and all new documents will be formatted that way. These settings will also now be in your Project Settings. You can also import styles/formats from other projects using the Style Panel under Format in the menu bar. (Note: do not use the tab key for paragraph indent as this will mess up the formatting in compile.)
Another Menu command which will help you personalize your Editor appearance is the View > Text Editing >
You can choose multiple options about what is visible including the:
Format Bar
Ruler
Page View (a simulation of how your writing would appear on book pages) Note: this is NOT dynamic and occasionally words can be cut off in this view. This mimics a book or the view in Microsoft word.
Typewriter Scrolling (this will keep your cursor always in the middle of the editor while typing)
The Editor appearance can be further adjusted in the Options Panel via the Menu Command File > Option:
File > Options > Editing
File > Options > Appearance > Main Editor (Here you can set editor window width, margins at the top and bottom as well as choices of the color of the editor window (light or dark), text color, text selection highlight, default text zoom, and current line highlight among other options.

The Color options tab is highlighted here, but the other tab Options has multiple ways to personalize the experience as well.
Now, that you have the view and text you want to write with it is time to learn the tools you have at your disposal starting with the Header and Footer bars which each contain many useful tools.

A modified image of the Header Bar of the Scrivener Editor.
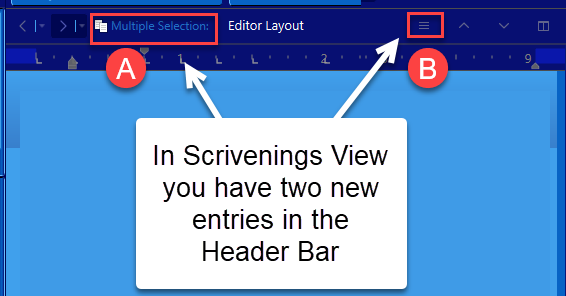
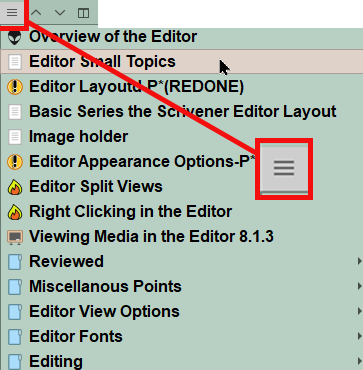
Clicking B (above) will show a tree view showing all the files and folders in the current Scrivenings view and the Folders will have a caret> to their right to navigate to their subdocuments. This allows you to choose a Binder file/folder to quickly navigate around the current Scrivenings view to a specific document. (see below)
Header Bar
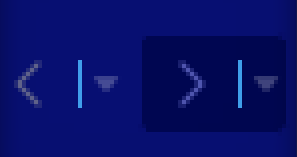
1. History- clicking the < and > carets will move the Editor backwards or forward in the viewing history of the files/folders in the Binder and NOT in the physical file order (Much like a web browser). If you click a caret and hold the mouse button down, then you will see the full history listing.
(Note you can navigate a copyholder history with keyboard history commands- Alt + { (backward) or Alt + } (forward) but must be in split view and browsing history is done in the opposing split window. Must hold shift key before using the Alt + { or } commands as those symbols are upper case.

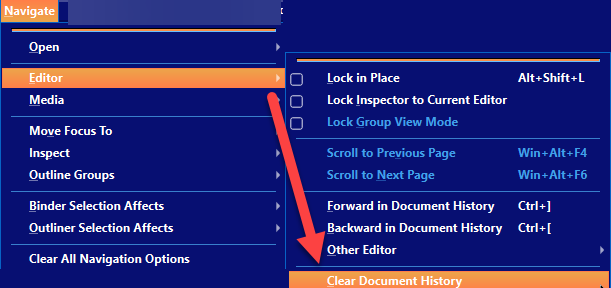
Note: Using the Menu command Navigate > Editor > Clear Document History will remove this history if want to reset. Note: this must be done for each Editor pane if in split view.
2. The Icon of a File/Folder in the Header Bar- will be same as in the binder. (right clicking on this icon will reveal multiple options including revealing the file’s location in the binder = Reveal in Binder). This Editor Icon can be dragged just as icons in the binder can be.
Double click the Icon in the Editor header bar will open the file/folder as a Quick Reference Panel. This also works in Scrivenings View if click inside a file/folder. If you click the Icon you will get a QRP of that file to open even if the Icon references the folder holding the files in the Scrivenings View. However, if the Scrivenings View is created from multiple selections not under a single folder this double clicking of the Icon results in nothing happening.
If the icon is dragged into notes or the editor itself it will create a hyperlink to that file.
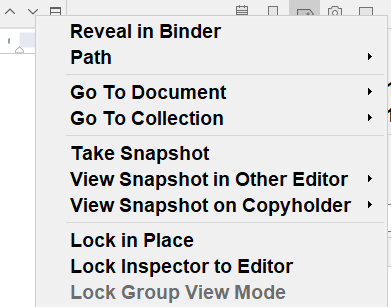
Right clicking on the Icon in the editor will show multiple options that can be very helpful.
Options Include:
Reveal in Binder
Path will show the Path to the file/folder
Go to Document will show Bookmarks or the option of going to any file in the Binder
Go to Collection will show Collections available
Keyboard Shortcut is Windows key + Shift + R will reveal file location in the Binder.

Right clicking on the Icon in the editor will show multiple options that can be very helpful.
3. The File/Folder Title- This will be just to the right of the icon. This can be edited by a single click within the title. Changing the title here will change your entry in the Binder.
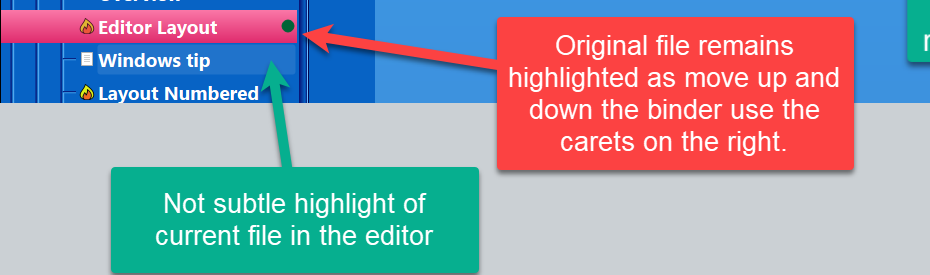
4. Next/Previous Documents on the right- These up and down carets change the file/folder being viewed in the editor window based on the current Binder order. (see #4 below) The particular file/folder will being viewed will appear in the last mode it was open in such as the corkboard or outliner view. The original file will still retain the active highlight colors in the binder, to help identify this as the starting file or folder. A lighter highlight will be on the current document being viewed in the editor. (The hierarchy order does not affect the order of the next/previous documents.
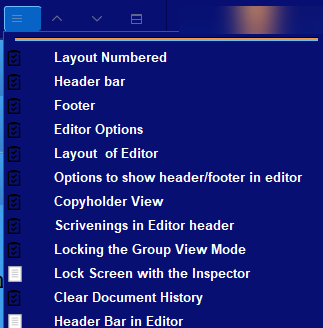
If in Scrivenings view, you will see a bar of 3 lines just to the left of the carets (#4 above) which will allow you to navigate within the current Scrivenings view. (See below)
Note: There are an additional two other ways to navigate between documents in the Binder.
1. Use Menu commands-
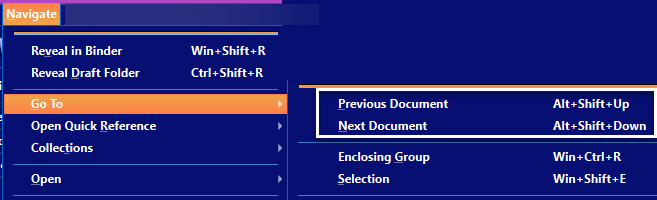
2. Use Keyboard Shortcuts Remember to first click inside the editor window so these shortcuts will work. Now, you can use the arrow key multiple times while holding the Alt + Shift keys. (The original file will remain highlighted.)

5. Split View control- this button (#5 above on the far right) when clicked creates a split view editor in a horizontal or vertical orientation. Holding down the Alt Key and clicking the Split view button will flip orientation from vertical to horizontal.
You can use Keyboard shortcuts to accomplish this as well.
Horizontal Split (hold the shift key then Ctrl and + key)
Vertical Split (hold the shift key then Ctrl and " key)
Remove Split View (Ctrl and ‘ key)
In Scrivener, you can lock the Inspector to a specific Editor split view window by right clicking on the icon in the editor header, or any caret in the header. This will keep information displayed by the inspector locked ONLY to that window till you break the lock. You will see a red I to indicate this function is active.
Right Click menu options after clicking on the Icon in the Header Bar of the Editor include: (see below)
Lock in Place will lock a window so that the view will not change no matter what other files you click till you unlock it. Your window will retain the active selection color and a red line underneath the header depending on the theme and the Inspector icons will be a highlighted in a red shade. (see modified image below)
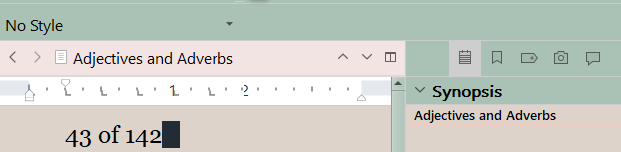
Lock the Inspector will force the Inspector to only reveal the data about that one file even if other files are clicked on in the other editor windows. Note: if this occurs you will see a red cirlce with an i appear in the affected window of the editor. (see 2 below) (Close window or right click on icon and uncheck option to remove this setting.)
Your window will retain the active selection color and a red line underneath the header if the header is in a split view.


Active Editor Window - Your active Editor window will have a blue background and a blue underline to indicate it is the window with the active focus when in split view. (see below) Note: In split view, the active window will have a blue line just above the editor window (or Ruler if that option is chosen). Remember, the theme you choose may modify the appearance.

In a split screen view (up to 4 windows with copyholders) the active window will be underlined in blue and a locked window will be underlined in red. Copyholders will be discussed in a separate blog in the future.
In Scrivenings View you will have an additional option in the Editor header on the right side. You will see 3 bars. These essentially serve as a table of contents for your current Scrivenings View. If these are clicked on then you will see a listing of all the documents in the current Scrivenings view with a caret at the right of documents with subdocumnets. Now clicking on any document name in this drop down takes you immediately to that document. This becomes a quick way to navigate around in Scrivenings view. (see below)

The Footer Bar
Footer Bar

Modified Footer Image
#1. Zoom- This can be changed for a specific editor window by clicking in lower left corner where you will see current level and adjusting by clicking the caret and choosing a default value or use other to set a custom zoom. The primary use is to help old eyes read more easily and does not affect the Compile function.
Windows tip: You can hold the Ctrl key and use the mouse wheel to dynamically change the zoom level just like you can on a web browser. This works wherever the zoom level can be changed.
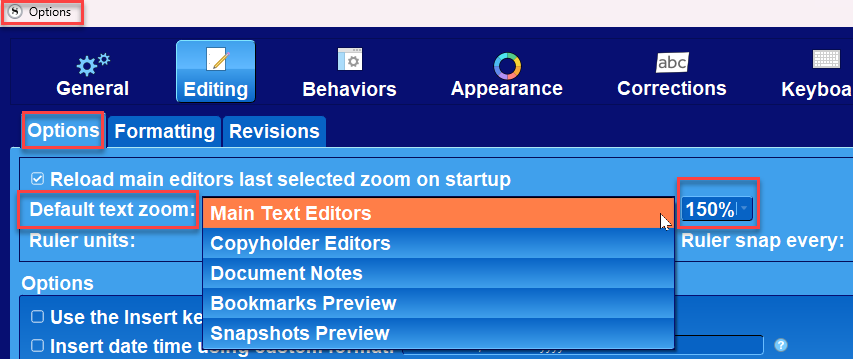
Zoom can also be set globally using the Menu command File > Options > Editing > Options Pane
The Default text zoom can be set individually for each option below:
Main Text Editor
Copyholder
Document Notes
Bookmark Previews
Snapshot Previews
#2. Word Count is in the center of the Editor.
Scrivener Tip- If the word count suddenly disappears you have accidentally gone into script mode. (The word count is not visible in Scriptwriting Mode.) Click Ctrl + 8 to leave this mode.
These are real time statistics that change as you type.
When writing or editing text, in the middle of the footer a word or character count will be displayed. Hovering your mouse pointer over the word count reveals additional info after a brief delay. By default the word count reflects the whole file. If you select only part of the file, the word count will change color to red and begin with the phrase Selection.

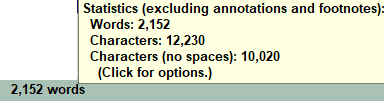
Clicking the mouse when this field is open, opens a new box with even more information with the option to include footnotes, comments and annotations in the word count. (see below)

Using the Menu command File > Options > Editing includes an area where you can choose the option to display the Live count in words, characters, or characters without spaces.
#3. Document Targets at the far right of the footer you see the target icon (A below) which when clicked on allows you to set specific word or character targets for the documents with the minimum, overrun and overall target numbers. You can also create Chapter and Scene templates with built in targets to use again and again to quickly create a novel framework. This will be visible in the Outliner as numbers if you choose certain options such as Total Target and Target as numbers, or as color bars showing progress towards your goal with Progress and Total Progress. Once you have set your target goals for the document and click ok, then the target symbol (A) changes to a bar which shows your writing progress in color (B). The options on which colors are displayed are set in the Options Panel. Use the Menu command File > Options > Appearance > Target Progress Bars Colors (and check the Options tab as well).

#4. The Compile Icon (see above) will show the file or folder Compile status with a checkmark for included or an X for not included. This information will also be seen in the Inspector in Metadata panel below general metadata.

Included in Compile Icon

Not included in Compile Icon
Now that you know your way around the editor window, we will tackle different ways to use the Editor including split views and the Quick Reference Panel in future blogs.
Note:
The Arrow keyboard keys can move you up, down, or sideways in the Editor window.
The page up key will rapidily advance you to the top of the page. (or you can drag the scroll bar on the right.)
Scrivener’s default behavior is to open the page where you last left off.
The Keyboard command Ctrl + Home Key takes you to the top of a document and the Ctrl + End Key takes you to the bottom of a document.
Footer Bar in Group View (Outliner View below)

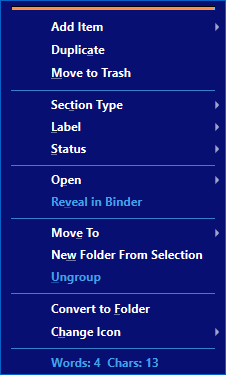
1. + Sign adds a blank text file below the current window in the Binder
2. + Sign inside a folder adds a new folder below the current window in the Binder
3. … Gives a modified Right Click menu option identical to right click options on individual files in group view.
4. Shows the Autoload Button is in the inactive state vs #5 where light blue indicates the active state.
Clicking this while in a split view will transfer the file you selected in the Outliner into the other window for viewing.
Just right of this is the number of files/folders currently on screen in the group mode.
6. The 3 Bars at the far right of the Footer Bar represent the option to turn off or include the Synopsis in the Outliner View.
Footer Bar Group View (Corkboard View below)
Is identical above till the far right side where are multiple Corkboard specific options that will be covered elsewhere.

Updated 6/17/26